Welcome to our comprehensive guide on how to install Nmap on Ubuntu. Whether you're a seasoned cyber security professional or someone just venturing into the field, this guide is designed with you in mind.
Nmap is essential in network scanning and security auditing, offering insights into your network's potential vulnerabilities. Installing Nmap on your Ubuntu system allows you to move substantially towards a more secure network environment.
We've put together this step-by-step guide that covers installing Nmap via the package manager, compiling it from source, utilizing Snap, and even running it in a Docker container. Additionally, we've included a section on uninstalling Nmap, in case you ever need to.
But first things first, let's delve into what Nmap is and why it's a vital tool in the cyber security toolbox.
What Is Nmap?
Nmap, or Network Mapper, is a reliable ally for ethical hackers and pentesters when a network scan is on the agenda. This powerful, free, open-source tool is designed for network discovery and security auditing. By harnessing the power of Nmap, you can map network hosts and services, gaining access to essential information that can then be dissected to pinpoint potential vulnerabilities.
Why Use Nmap?
Renowned for its efficacy and reliability, Nmap is the go-to tool for many cyber security experts and ethical hackers. One key reason? Flexibility. Whether your task is scanning a lone target or sweeping through large networks, Nmap has you covered.
Through the lens of Nmap, you gain a wealth of insights into the open ports, hosts, services, and operating systems within your network. Such granular information is pivotal, whether you're plotting an attack strategy for penetration testing or scouting for weaknesses to fortify your defenses.
But Nmap isn't just a one-trick pony. Its functionality extends far beyond standard network scanning. It can facilitate more nuanced operations such as host discovery, OS detection, or even the execution of Lua scripts via its Nmap Scripting Engine (NSE). Ever tried an idle or 'Zombie' scan to gather intel stealthily without directly connecting to the target? Nmap makes it possible.
If you need to look up a Nmap command, check out our Nmap cheat sheet or use our command generator here:
Nmap Command Generator
Say goodbye to the hassle of trying to remember the exact syntax for your Nmap commands! With our Nmap Command Generator, you can simply say what you need Nmap to do, and we will generate the command for you.
Installing Nmap With Package Manager
For a fast and effective way to get Nmap up and running on your Ubuntu system, look no further than the apt package manager. It's a straightforward method, perfect for those new to cyber security or anyone who values simplicity. This approach lets you deploy a stable Nmap version with just a few terminal commands.
Step 1: Open Terminal
To kick things off, open your terminal. An easy way to do this is to press Ctrl+Alt+T on your keyboard. This combination is a quick way to launch the terminal on Ubuntu.
Step 2: Update Package Manager
With the terminal open, it's time to update your package list. In the terminal, type the following command and press Enter: sudo apt update. You will be required to provide your password.

Step 3: Install Nmap
Once the update is complete, it's time to install the Nmap package. In the terminal, type sudo apt install nmap, and press Enter. Ubuntu may ask for your password again. Type it in, and press Enter.
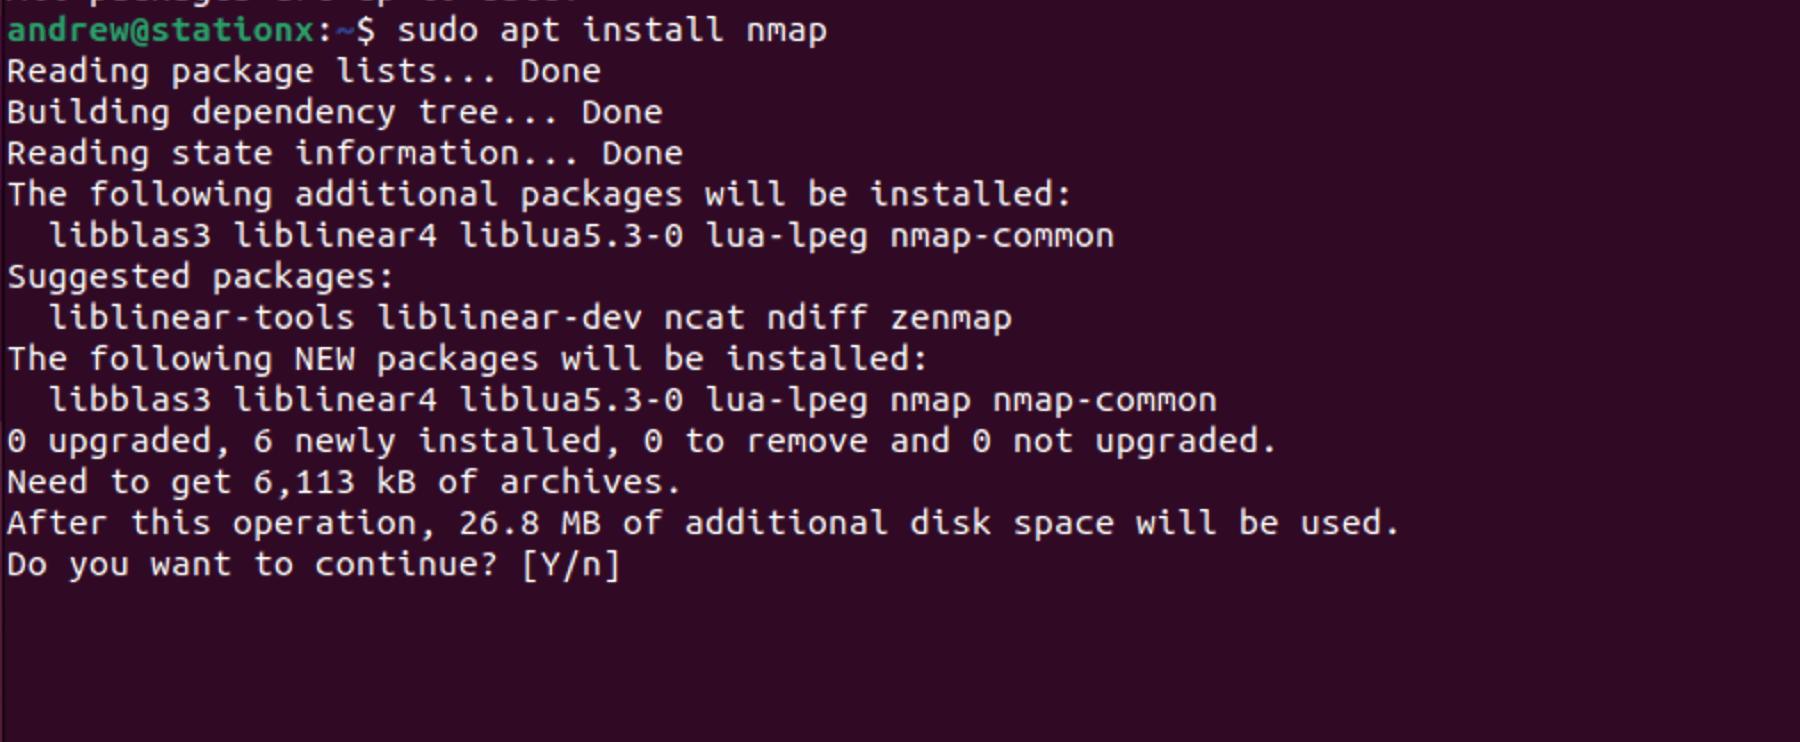
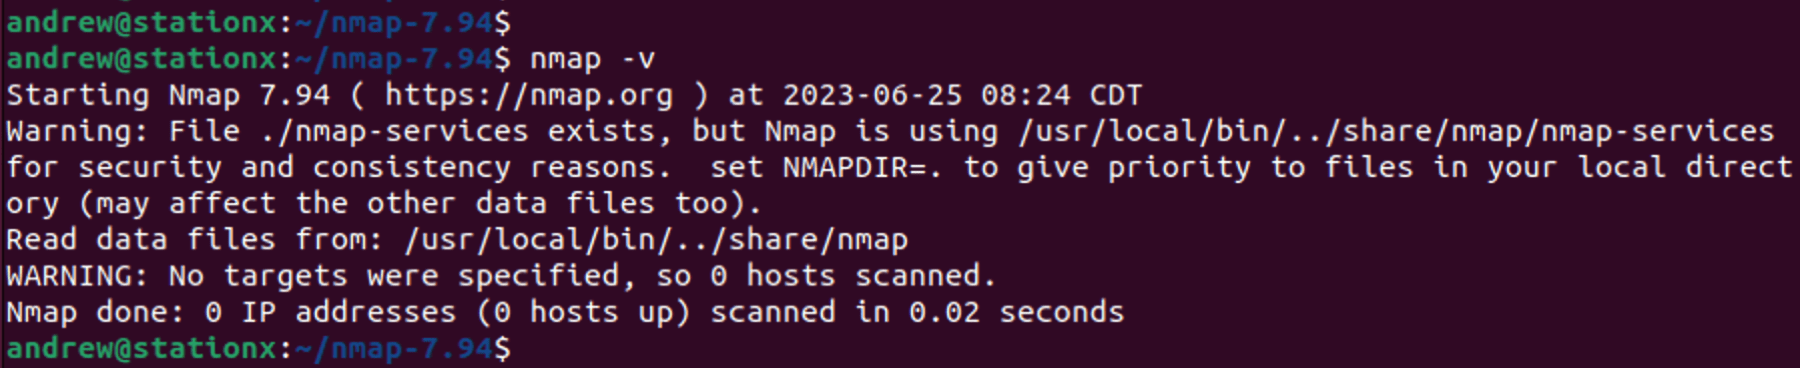
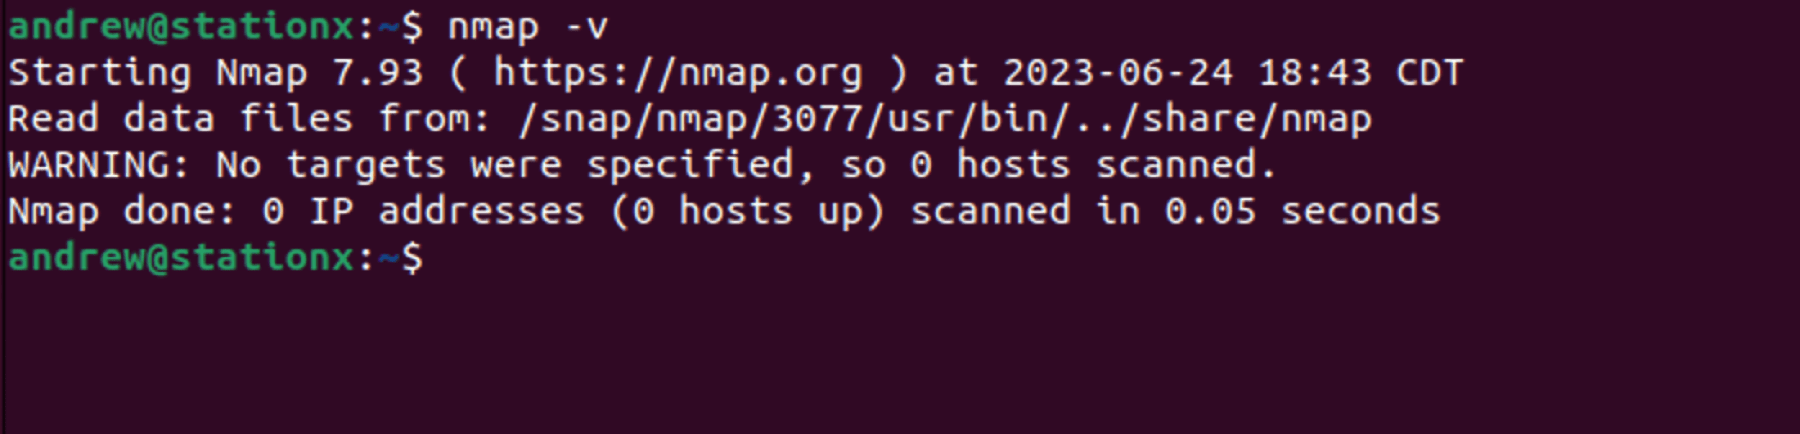
The terminal will show the progress of the installation, and once it's done, Nmap will be installed on your Ubuntu system. To verify the installation, you can type nmap -v in the terminal and see the version of Nmap installed.

Remember: In Linux, sudo stands for "super user do." This command is used to perform tasks that require administrative or root permissions. Always be careful when using sudo because it allows you to make critical changes to your system.
And just like that, you've installed Nmap using the package manager! It's a straightforward process that lets you use this powerful tool to protect your network.
Compiling Nmap From Source
If you need the most recent Nmap features not yet available in the stable release, compiling from the source code is your best bet. Though this might involve some instability, it provides access to the newest updates. Let's walk through the process.
Step 1: Open Terminal
Just like before, let's open the terminal. You can do this quickly by pressing Ctrl+Alt+T on your keyboard. The terminal will pop up, ready for your commands.
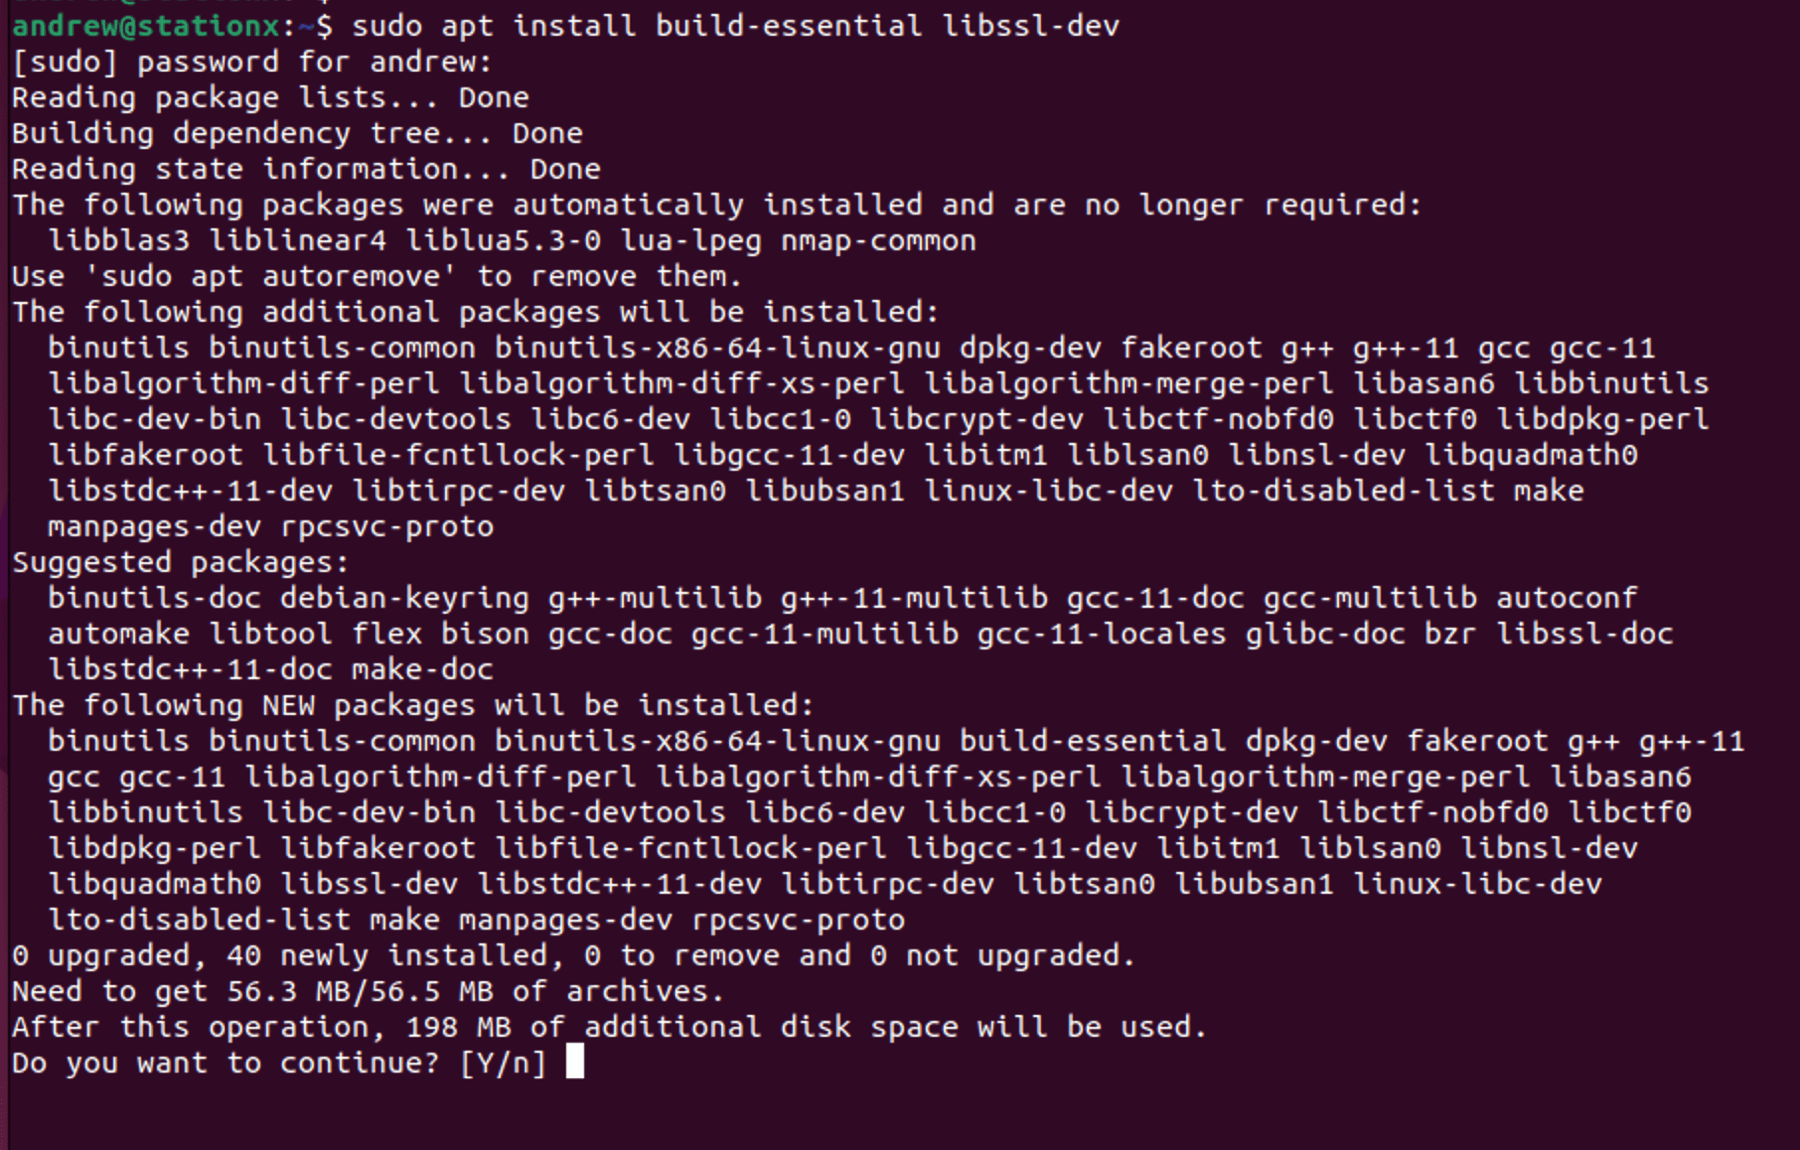
Step 2: Install Required Packages
To compile Nmap from source, there are certain required packages you need to have on your Ubuntu system. Enter the following command into the terminal: sudo apt install build-essential libssl-dev
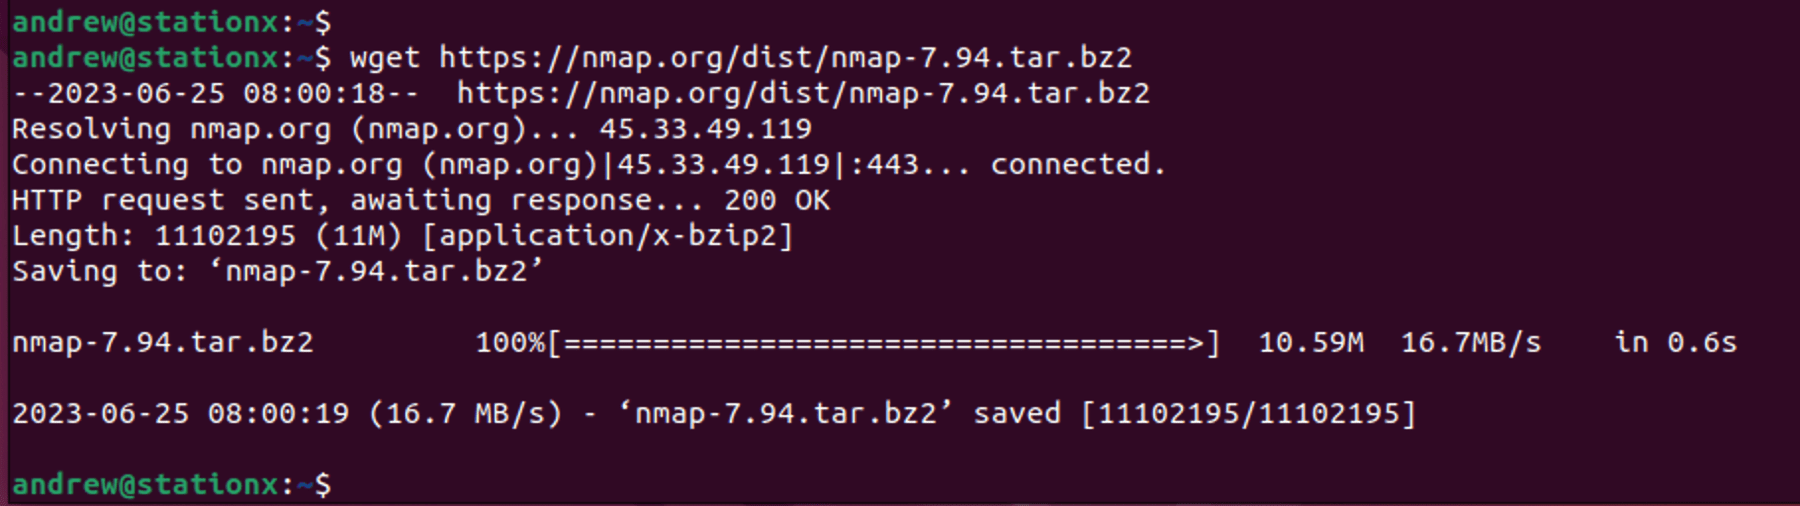
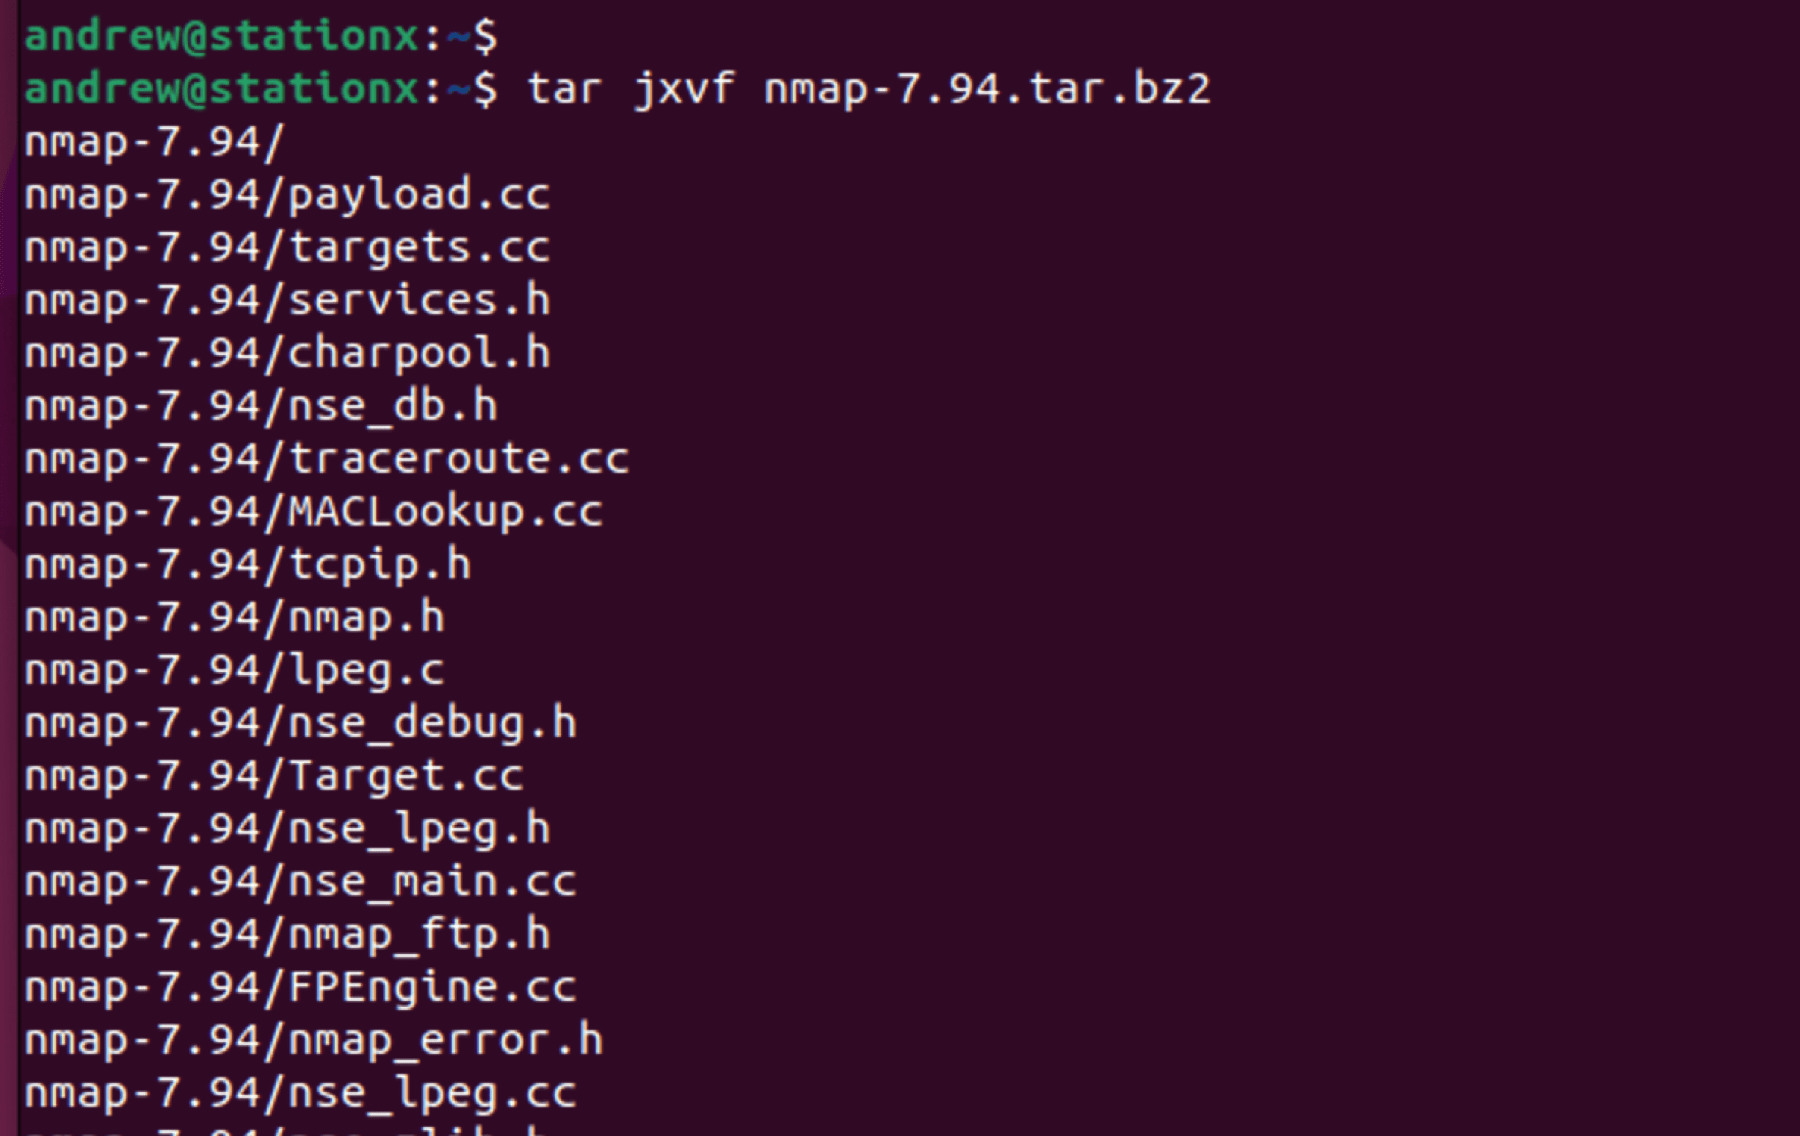
Step 3: Download Nmap Source Code
Next, we need to download the Nmap source code. You can grab it directly from the official Nmap website using the wget command: wget https://nmap.org/dist/nmap-<version>.tar.bz2. Be sure to replace <version> with the latest version at the Nmap download page, in our case it was nmap-7.94.
Step 4: Extract the Source Code
Once the download is complete, you'll need to extract the tarball (a type of compressed file) with this command: tar jxvf nmap-<version>.tar.bz2
Step 5: Navigate to the Nmap Directory
Now, navigate to the directory that was created when you extracted the tarball: cd nmap-<version>

Step 6: Compile and Install Nmap
Finally, it's time to compile and install Nmap. This is done with the following command: ./configure && make && sudo make install

Heads Up: Compiling from the source takes longer than installing from the package manager. Also, remember the version you've just installed might not be the stable release. Use this method if you specifically need the latest updates directly from the source code.
There you have it! You've just compiled and installed Nmap from its source code. While this method requires a few more steps than installing from the package manager, it gives you the opportunity to access the latest and greatest that Nmap has to offer.
Nmap commands can be quite complex, depending on what you want to do. Check out our handy guide for The Top 20 Nmap Commands You Must Know.
Installing Nmap Using Snap
If you're looking for a way to get Nmap up and running without needing dependencies or updating your package list, the Snap package manager is a fantastic alternative. Snap is a universal package manager and comes pre-installed on Ubuntu 16.04 and above. This method ensures you have the latest version of Nmap without the need for compilation or dependency resolution. Let's dive into how to install Nmap using Snap.
Step 1: Open Terminal
Fire up the terminal by pressing Ctrl+Alt+T.
Step 2: Install Nmap Using Snap
Skip the package update. Directly type sudo snap install nmap and press Enter. Key in your password to start the install.

Check your installation by typing nmap -v. The terminal should display your newly installed Nmap version.
Note: Snap applications are typically bigger in size compared to apt packages or compiled applications. This is due to Snap packages containing all the dependencies needed for the application to run. Keep this in mind if you're running low on storage space.
And there you have it. You've successfully installed Nmap using Snap! This method is particularly helpful if you're seeking a quick installation without the need to manage dependencies or update package lists.
Installing Nmap in Docker
If you're looking to run Nmap in a contained environment or you want to run Nmap without installing it directly on your Ubuntu system, Docker is the perfect solution. Docker allows Nmap to run in a separate, isolated environment, ensuring system-wide stability. Here's a quick run-through of running Nmap in a Docker container. You will need Docker installed first, which can be done with sudo apt install docker.io or by compiling their official source.
Step 1: Open Terminal
As always, kick off the process with Ctrl+Alt+T.
Step 2: Pull Nmap Docker Image
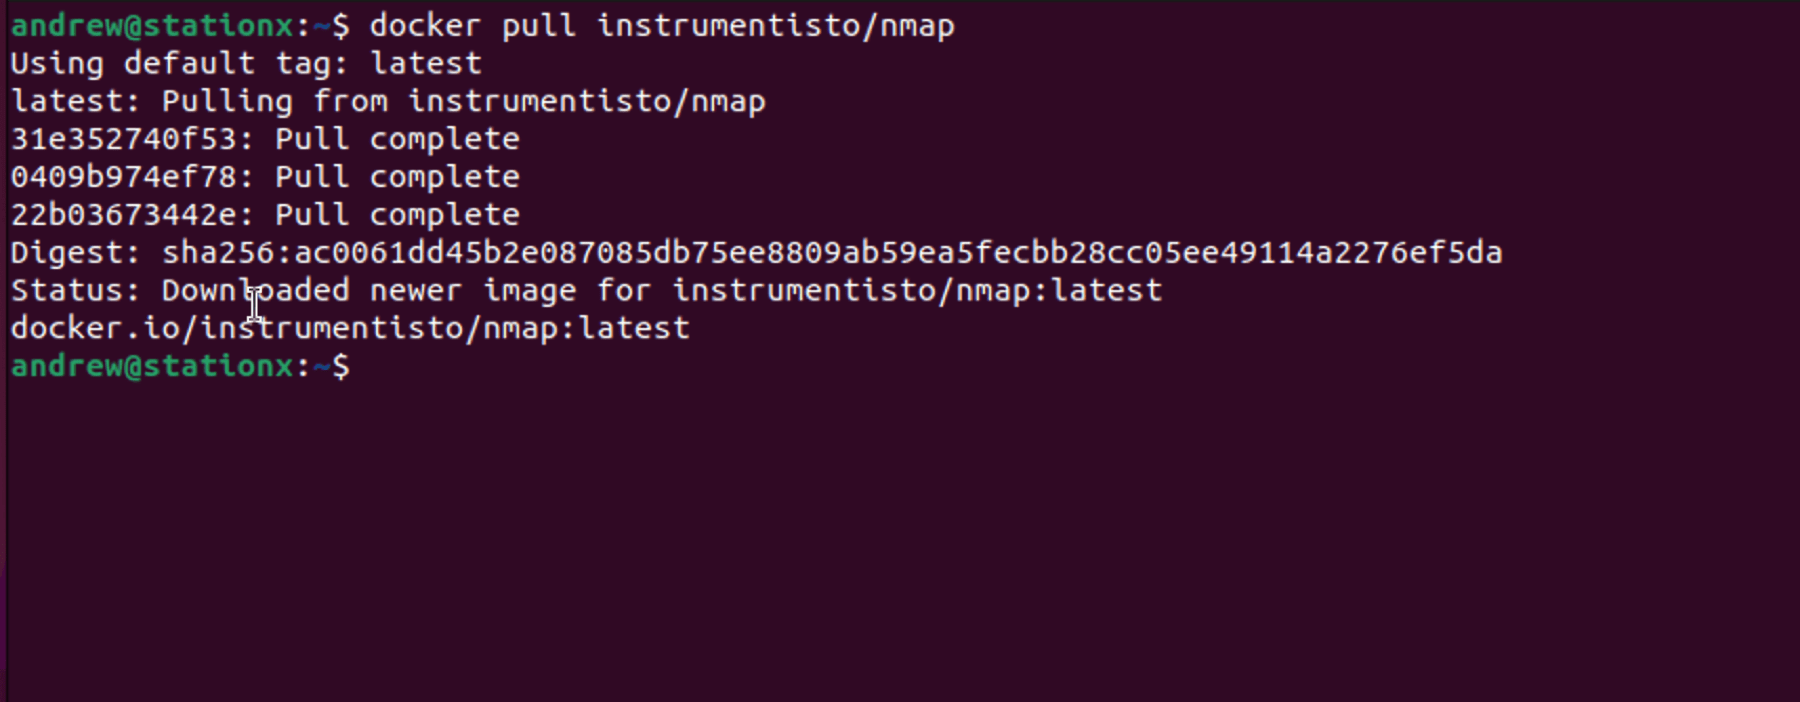
With the terminal active, input docker pull instrumentisto/nmap and hit Enter to fetch the Nmap Docker image.
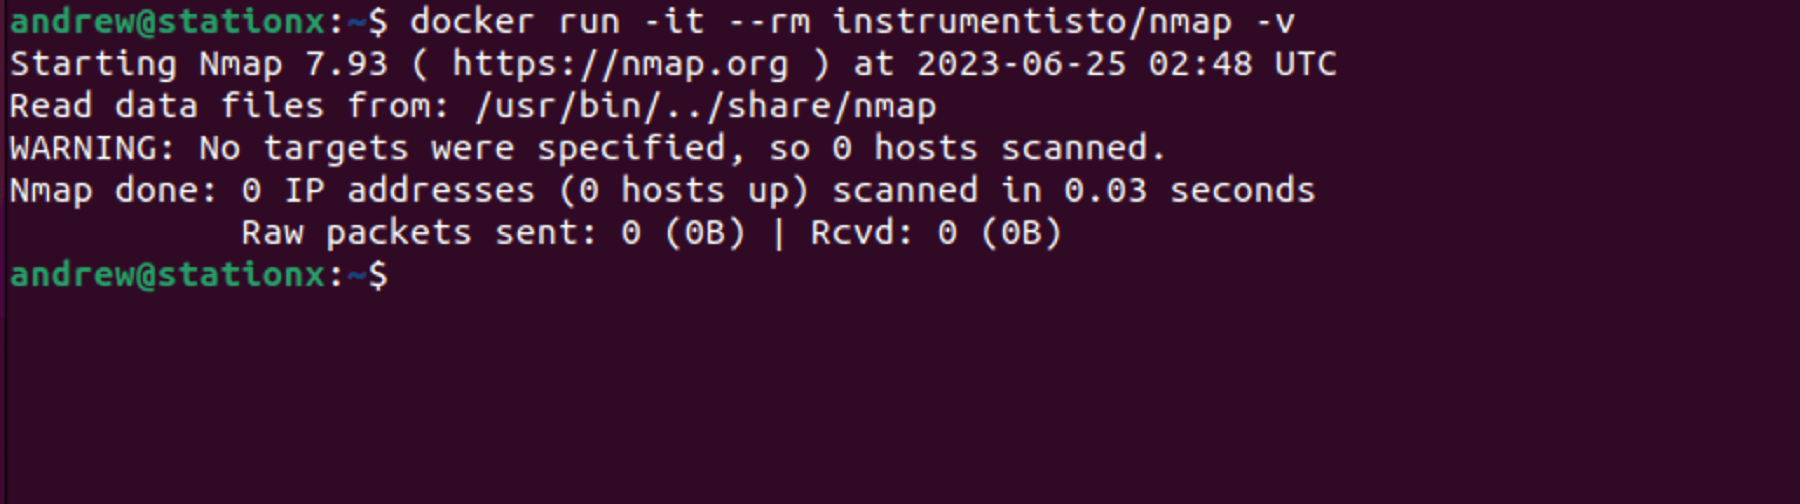
Step 3: Run Nmap in Docker
Upon fetching the image, execute docker run -it --rm instrumentisto/nmap -v and press Enter to run Nmap in Docker, presenting the Nmap installed version.
Remember: Docker's isolated environments, or containers, are ideal for running Nmap without system conflicts. However, Docker-based operations may slightly differ from direct system operations.
And there you have it! You've successfully run Nmap in a Docker container. This method gives you the flexibility to run Nmap without installing it directly on your system, keeping your Ubuntu system clean and conflict-free.
Ever pondered when to use Nmap instead of Wireshark? Click the link to find out.
Sudo Uninstalling Nmap
Even though Nmap is a staple in many ethical hacker and pentester toolkits, there may be times when it needs to be uninstalled from your Ubuntu system. Let's take a quick look at how you can achieve this:
Step 1: Open Terminal
Start by launching the terminal with Ctrl+Alt+T.
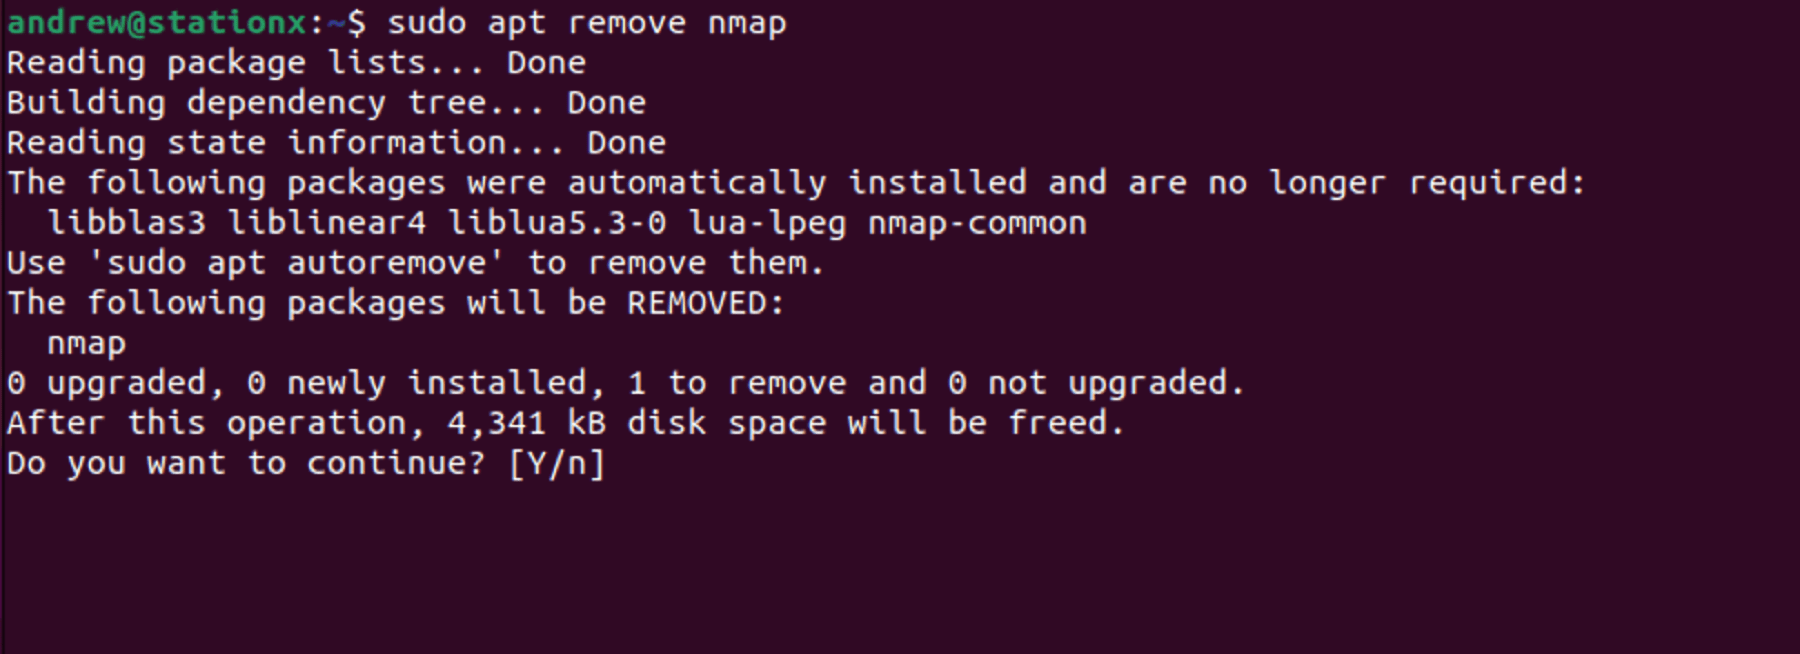
Step 2: Uninstall Nmap
In the terminal, input sudo apt remove nmap, and hit Enter. You'll need to confirm with your password.
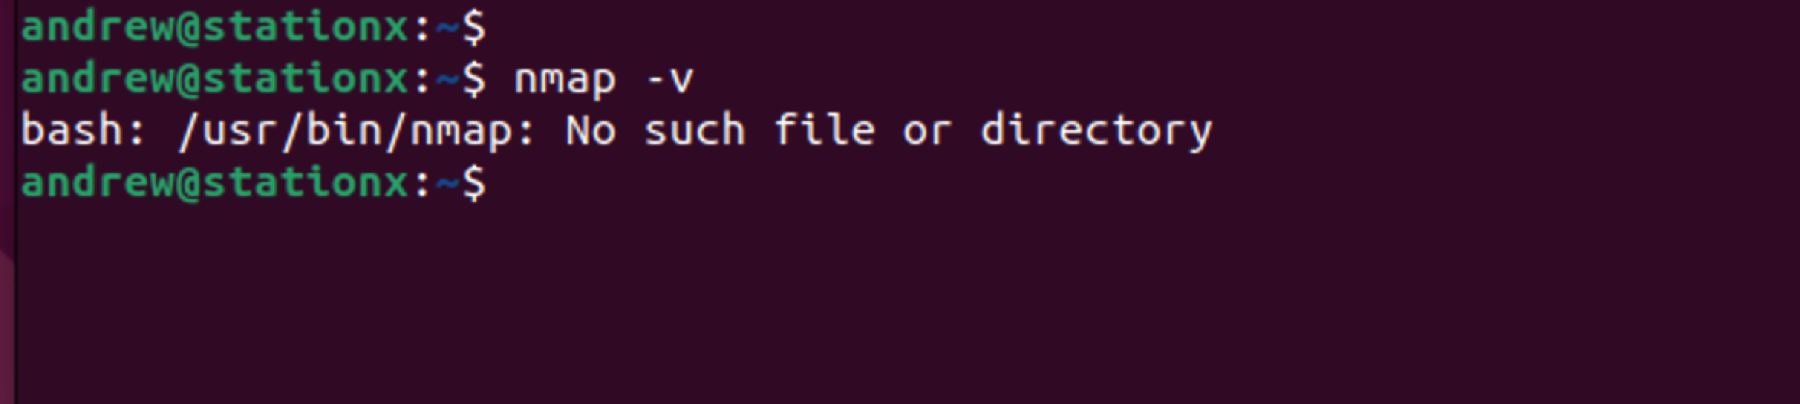
After the process ends, Nmap should be uninstalled. A quick way to confirm this is by attempting to run nmap -v. If uninstalled, you'll see an error indicating the absence of the nmap command.
Just a reminder: Before you uninstall any critical software, ensure that it aligns with your overall strategy. It's easy to uninstall but may take time to reinstall and reconfigure.
And that's it! You've successfully uninstalled Nmap. But remember, should the need arise, you can always reinstall it using the methods outlined above.
Conclusion
And there you have it, a comprehensive guide to installing Nmap on Ubuntu using various methods. Each route offers its own unique advantages, so feel free to choose the one that best aligns with your needs. With Nmap as part of your cyber security toolkit, you're well-equipped to explore and safeguard your network effectively.
Ready to take your skills to the next level? Our curated range of courses is the perfect next step. Check out these great courses that we’ve lined up for you.


Frequently Asked Questions
You can start Nmap in Ubuntu by opening the terminal and simply typing nmap followed by the command you want to execute. For instance, to run a simple scan on an IP address, you would type nmap <IP address>. Just replace <IP address> with the IP address you want to scan. So, the whole command might look something like this: nmap 192.168.1.1.
Yes! Zenmap is the official GUI interface for Nmap. It allows you to use Nmap's powerful features but with a more visual and user-friendly approach. Zenmap is great for beginners or those who prefer a more intuitive layout, but keep in mind, the command line tool version of Nmap is often more flexible for advanced or customized scans.
from StationX https://bit.ly/3PO5ZZn
via IFTTT
great
ReplyDelete