StarWind Virtual SAN Free is a great HA storage solution for homelabbers and even production. Unlike the trial license that expires in 30 days, the free license is eternal would work for much longer (stay tuned for the upcoming changes in VSAN Free licensing).
There are some caveats, though: no GUI for LUNs creation and support means the community forum. Our engineers will happily help you there.
Management and initial setup run entirely through PowerShell. You can build your own scripts from the included samples, and you’ll want to. The CreateHA script is the most commonly asked question on the forum. What follows covers scripts for both Linux and Windows installations, plus how to standardize deployments across multiple sites.
Deployment workflow
1. Grab the deployment guide for your hypervisor from the resource library. Follow it until you hit the step where you create StarWind Highly Available (HA) devices.
2. Stop there.
3. Create HA devices with the script below, then pick the guide back up where you left off. Check your system against the StarWind VSAN system requirements and the best practices guide before you start.
How to get the scripts?
CreateHA_2 and CreateHA_3 ship inside the StarWindX module, which you install from the same executable as StarWind VSAN itself. The latest build is on the downloads page.
Pick the right hypervisor during download. (Check your confirmation email if you lost the link.)
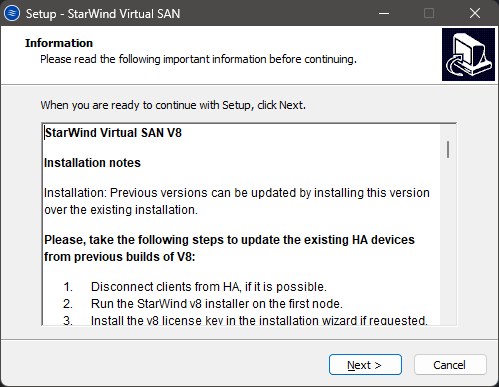
The Windows installer is straightforward:
1. Run it as Administrator.
2. Hit Next.
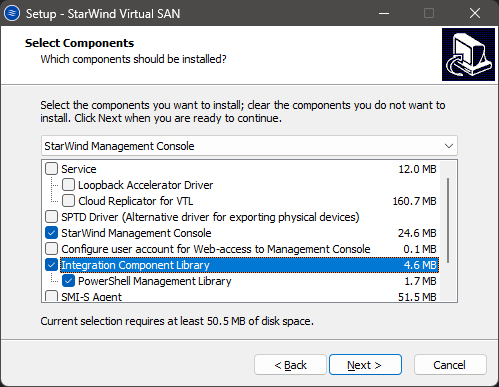
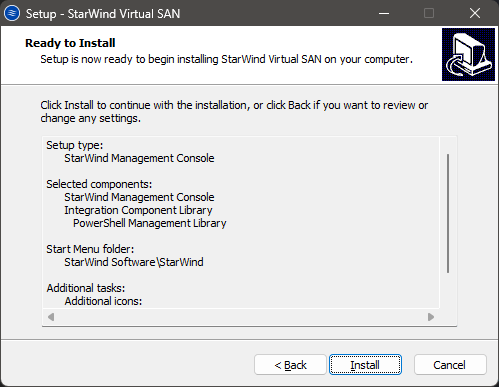
3. Select Management Console from the drop-down and tick Integration Component Library. The Windows Management Console works for monitoring even in the Free edition, and neither piece asks for a license key. Just pay attention to what you select.
4. Click Next again.
5. Create a desktop icon if you want one, then hit Next once more.
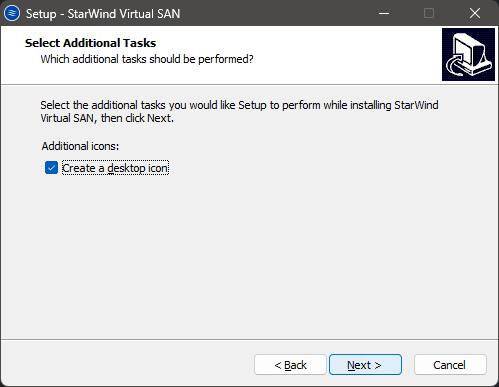
6. Then click Install.
For Linux-based setups (i.e., bare metal and CVM), grab the installer from the Web UI. Hit the gear icon, then Downloads. Once Management Console and StarWindX are on the box, the samples sit at C:\Program Files\StarWind Software\StarWind\StarWindX\Samples\powershell.
The script
Now, lets take a look at the script. The script below is pretty much a standard Create2HA.ps1 with some minor adjustments.
param($addr="172.27.31.198", $port=3261, $user="root", $password="starwind",

$addr2="172.27.31.199", $port2=$port, $user2=$user, $password2=$password,

#common

$initMethod="NotSynchronize",

$size=1024,

$sectorSize=512,

$failover=0,

$bmpType=1,

$bmpStrategy=0,

#primary node

$imagePath="/mnt/sdb1/volume1",

$imageName="test2",

$createImage=$true,

$storageName="",

$targetAlias="test2",

$poolName="pool1",

$syncSessionCount=1,

$aluaOptimized=$true,

$cacheMode="none",

$cacheSize=0,

$syncInterface="#p2=172.16.20.231:3260,172.27.21.231:3260",

$hbInterface="#p2=172.16.10.231:3260,172.27.31.199:3260",

$createTarget=$true,

$bmpFolderPath="",

#secondary node

$imagePath2="/mnt/sdb1/volume1",

$imageName2="test2",

$createImage2=$true,

$storageName2="",

$targetAlias2="test2",

$poolName2="pool1",

$syncSessionCount2=1,

$aluaOptimized2=$false,

$cacheMode2=$cacheMode,

$cacheSize2=$cacheSize,

$syncInterface2="#p1=172.16.20.230:3260,172.27.21.230:3260",

$hbInterface2="#p1=172.16.10.230:3260,172.27.31.198:3260",

$createTarget2=$true,

$bmpFolderPath2=""

)


The full parameter list is documented in the configuration guide. A few need explanation.
User and password
The defaults for talking to the service are root/starwind. They stay the same even if your CVM uses different credentials.
The password is stored encrypted in
C:\Program Files\StarWind Software\Starwind\StarWind.cfg
For CVM and Linux bare-metal deployments, that path is
/opt/starwind/starwind-virtual-san/drive_c/starwind/StarWind.cfg
initMethod
Do you want initial sync to happen or not? Skipping synchronization when creating devices saves time. The script uses NotSynchronize for this reason, though you can also set this to SyncFromFirst, SyncFromSecond, or SyncFromThird to force a full sync from a specific node right away.
size
Device size in MB.
sectorSize
Either 4096 or 512. A sector size of 512 is required for Linux-based systems (and it works fine on Windows too). VMs running databases sometimes behave oddly with 512.
failover
Set 0 for Heartbeat, 1 for Node Majority. In CreateHA_3.ps1, you can set this parameter to 1 to create a 3-way replica using Node Majority. Node Majority relies only on synchronization links for communication. You can drop the heartbeat line entirely. If you need a 2-way mirrored device with Node Majority, use CreateHAPartnerWitness.ps1 or CreateHASmbWitness.ps1 instead. Learn more about failover strategies here.
bitmap block
RAM works most of the time. If you’re unsure, or there is no storage faster than the data disk connected, leave it as is. Learn more about bitmap here
imagePath
Where the device sits. Watch your forward and backward slashes. In CVM, HA devices sit on the block device formatted as XFS while creating a volume.
imageName
Name for the imagefile.img. That isn’t the target name yet. Stay consistent. You can use the same name on both nodes.
storageName
Leave it. It’s only used if you’re adding a partner to an existing device.
targetAlias
The iSCSI target name. Choose it carefully. It can be node-specific like host1-target1. In practice target1 is enough. The same name works on both nodes.
poolName
Leave it. It relates to SMI-S provider work.
syncSessionCount
Leave it. This controls how many iSCSI sessions an HA device establishes over a sync interface. A value of 1 is enough in most cases. You can try 2. Don’t expect a positive performance impact. It’s rarely set higher than that.
aluaOptimized
Leave it as is.
Caching
In most cases you don’t need a cache. Unlike the controller cache, it isn’t battery-backed. Learn more here about how caching works.
syncInterface
The partner synchronization IP address. This must be a dedicated IP that is not used for data or management traffic.
hbInterface
The partner heartbeat IP addresses. VSAN uses heartbeat only for ping. You can set heartbeat over the data and management links if you want. At least one StarWind communication path should go over a different NIC to avoid split-brain.
For Windows-based installations, the same rules apply. Watch your slashes. The imagePath should look like My computer\C\starwind
Common issues
Things go sideways. Usually it’s one of five things.
- It might not work on the first attempt. Remove leftover files from C:\Program Files\StarWind Software\StarWind\headers and from the underlying storage. For CVM and Linux, check /opt/starwind/starwind-virtual-san/drive_c/starwind/headers.
- Back up your working script. Updating StarWindX overwrites anything saved in the default folder at C:\Program Files\StarWind Software\StarWind\StarWindX\Samples\powershell.
- StarWindX and StarWind VSAN versions must match. Use the same executable as the installed service version. If you installed VSAN from that executable, you’re fine. For CVM, check the Dashboards view. Compare the VSAN build shown there against the executable by right-clicking it, choosing Properties, then Details.
- Open ports 3260 and 3261 in the firewall. Port 3261 is for the Management Console. 3260 is for iSCSI.
- If you’re running multiple iSCSI connections in Windows – like 127.0.0.1 plus two partner IPs – set iScsiDiscoveryListInterfaces to 1. This is Windows-specific. Actually, it also applies to compute and storage separated scenarios.
Adding a partner to an existing device
Make sure every device is synchronized and connected from both replication partners to every node that consumes the storage.
- Stop the StarWindService on one node. On CVM or Linux, run:
sudo systemctl stop starwind-virtual-san.
For Windows, open services.msc and stop the StarWind Virtual SAN service.
- Navigate to C:\Program Files\StarWind Software\StarWind. On CVM, that’s /opt/starwind/starwind-virtual-san/drive_c/starwind/StarWind.cfg.
- Copy StarWind.cfg.
- Edit it as described above.
- Start the StarWindService.
- Wait for fast synchronization to finish.
- Repeat on the other node.
What about CreateHA_3?
CreateHA_3 builds a 3-way-mirrored HA device and supports both Node Majority and Heartbeat failover strategies, which is why you need to be careful with the interface parameters.
For a 2-way mirrored HA device using Node Majority, use CreateHAPartnerWitness.ps1 or CreateHASmbWitness.ps1. Those scripts have the same syntax but use only synchronization networks for heartbeat. They don’t use dedicated heartbeat networks. In CreateHA_3, pay attention to the sync- and hbInterface parameters. Double-check that you’re entering the replication partner IPs, not the local node IPs, for both heartbeat and sync interfaces.
FAQ
Why might replication be taking a while?
Check the $initMethod value and the device size.
Replication fails with error 200
Two things usually cause this. First, check if there is leftover content in the destination directory or /headers folder. Second, verify the interfaces are set up correctly on both primary and secondary nodes.
The device is created on one node but not the other
Verify interface configuration on both sides.
Sync keeps interrupting
Check MTU values and make sure they’re aligned across the entire stack. If you suspect networking, start with MTU at the base 1500. That’s 1514 for most Windows drivers.
How do I create a device from an existing .img file?
There isn’t a stock script for that. You’ll need to write your own. Good luck.
Final configuration checks
Creating a device properly is how you avoid split-brain. The displayed script configures redundant paths to keep HA devices resilient against NIC failures.
If you’re deploying StarWind VSAN for the first time, stick to the default Create2HA.ps1 parameters. Get the two nodes talking, verify the sync completes, and only then start tuning cache or failover strategies.
from StarWind Blog https://ift.tt/rNc0wF1
via IFTTT
No comments:
Post a Comment