Secret Management is a new way to manage your credentials with PowerShell. Secret Management uses a vault to store the credentials. You can for example store your credentials locally using the SecretStore extension, but what is very interesting is to store credentials remotely using third-party secret vaults such as: Azure Key Vault, KeePass, LastPass, Bitwarden, …
You can see the list here:
PS > Find-Module -Tag "SecretManagement"

The great advantage of this module is to handle many scenarios explained by Microsoft:
- Sharing a script across the organization without knowing the local vault of all the users
- Running a deployment script in local, test and production with the change of only a single parameter (-Vault)
- Changing the backend of the authentication method to meet specific security or organizational needs without needing to update all my scripts
In this article, I will describe how to use the Secret Management module with the Azure Key Vault extension.
Getting Started
First, we need to install the Secret Management module using the following command:
PS > Install-Module Microsoft.PowerShell.SecretManagement
Below is the output.

Next, we need to install the Azure Key Vault module using the following command:
PS > Install-Module Az.KeyVault
Now, we need to create a Service Principal to interact with your Azure Key Vault.
Open the Azure portal, go to Azure Active Directory -> App Registrations and create a new one. Then copy/paste the AppID + TenantID + create a secret.

Now, you can use this PowerShell code to interact with your Azure environment.
$appid = ”xxxxxxxxxxxxxxxxxx”
$key = ”yyyyyyyyyyyyyyyy”
$directoryId = ”zzzzzzzzzzzzzzzzzz”
$pass = ConvertTo-SecureString -String $key -AsPlainText -Force
$splat = @{
TypeName = "System.Management.Automation.PSCredential"
ArgumentList = "$appid" , $pass
}
$cred = New-Object @splat
Login-AzAccount -Credential $cred -ServicePrincipal -TenantId $Directoryid
Then, create a new Azure Key Vault using the portal

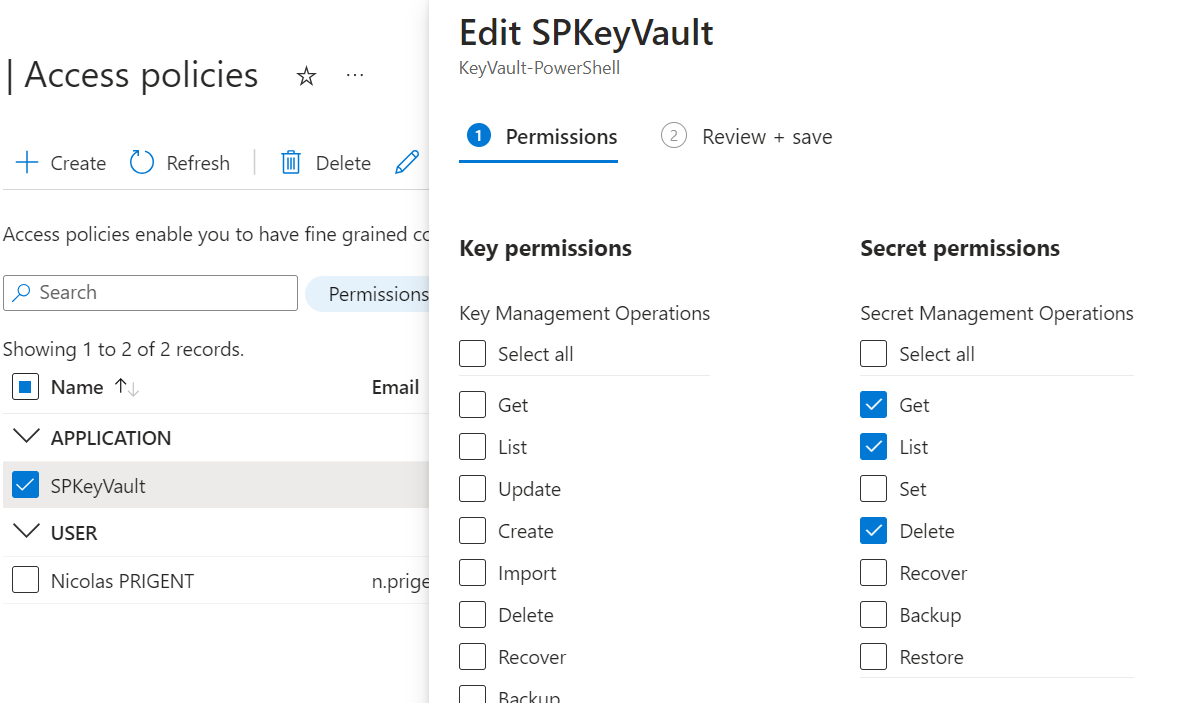
Go to the Access policies tab, and create a new one.

Select the permissions you want to apply, in my case I need at least Get and List permissions.

Then, apply the policy to the Service Principal previously created.

Everything is OK, we can now register the Azure Key Vault as a new Secret Vault:
PS > Register-SecretVault -Module Az.KeyVault -Name SyncToAzKeyVault -VaultParameters @{
AZKVaultName = "KeyVault-PowerShell"
SubscriptionId = "XXXXXXX-XXXX-XXXX-XXXX-XXXXXXXXXX"
}

PS > Get-SecretVault
Below is the output.

Now you can test if you can access to your vault using PowerShell:
PS > Test-SecretVault
The output should be True

Everything is configured, you can now create a secret. In the Azure portal, go to your Azure Key Vault, click Secrets and Generate/Import.
In my example, I created a secret named PowerShell.

We can try to retrieve the secret from our Azure Key Vault:
# Get secret as securestring
PS > Get-Secret -Name PowerShell -Vault SyncToAzKeyVault

# Get secret in clear Text
PS > Get-Secret -Name PowerShell -Vault SyncToAzKeyVault -AsPlainText
The first command retrieves the secret as secure string, and the second one retrieves the secret as plain text.

Now, we can delete a secret, but I will need to update the access policy.

I need to add the delete permission.
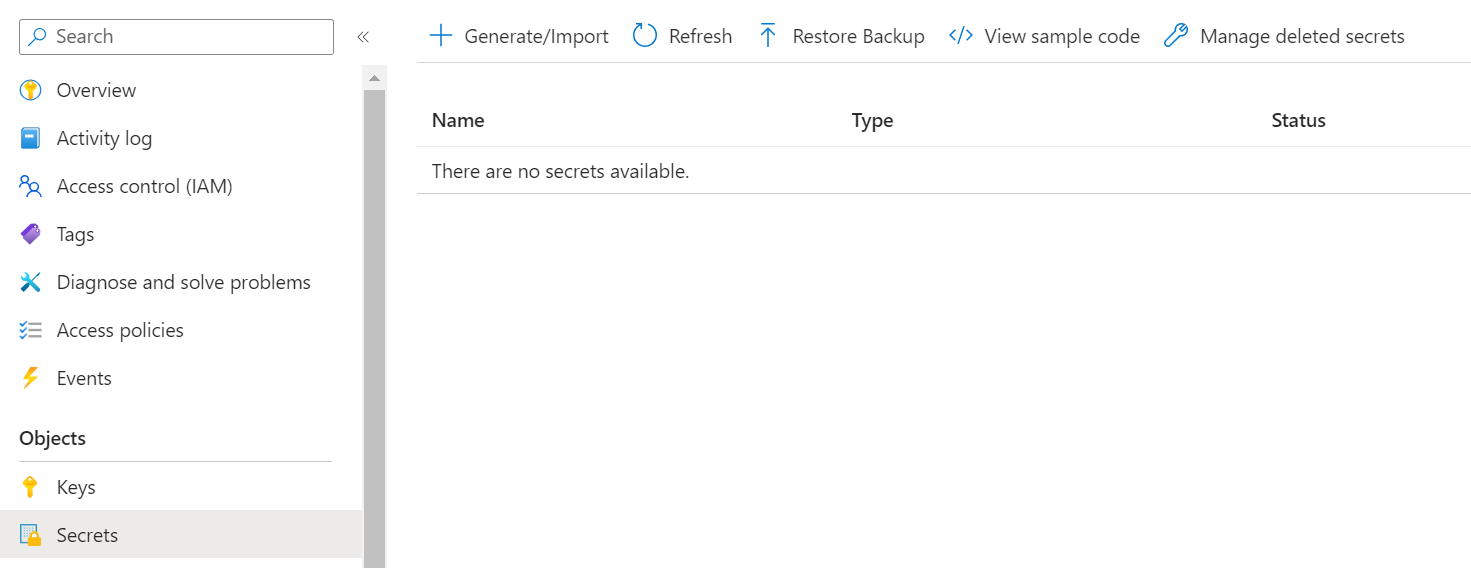
We can confirm that our secret no long exists.

Nothing appears in the portal.
And now, we can create a new secret but we also need to update the access policy.

Then, we can create a new secret named PowerShell2.
PS > $pass = ConvertTo-SecureString -String "Welcome" -AsPlainText -Force
PS > Set-Secret -Name PowerShell2 -Vault SyncToAzKeyVault -SecureStringSecret $pass

PS > Get-Secret -Name PowerShell2 -Vault SyncToAzKeyVault

PS > Get-Secret -Name PowerShell2 -Vault SyncToAzKeyVault -AsPlainText
Below is the output.

And we can confirm in the portal that the new secret has been created.

Related materials:
- WSUS Import Updates New PowerShell Import Method
- Creating a function in Windows PowerShell and saving it as a module
from StarWind Blog https://bit.ly/3PkgbYS
via IFTTT
No comments:
Post a Comment