Introduction
Hi, fellas. If you’re in charge of keeping your business data safe, you know that protecting it from ransomware and other threats is a top priority. One of the best ways to do this is using a 3-2-1-1 backup practice. That extra “1” in 3-2-1-1 stands for using immutable storage, such as on a Linux-based hardened repository.
In this article, I will show you how to turn your existing or aging server hardware into immutable backup storage to keep your data safe against ransomware. All you need is Veeam Backup & Replication and StarWind VSAN that will perform a role of Hardened Repository. This is a super easy and efficient way to keep your data safe, and I’ll walk you through the entire process step by step.
Why immutability?
Firstly, let’s talk about why backups have to be immutable. Essentially, it means that once a backup is made, it can’t be deleted or changed. This is important for crucial data because it means that even if a hacker gets into your system and tries to remove your backups, they won’t be able to. This is why write-once-read-many (WORM) storage media like tape libraries and optical media are commonly used for backups. However, these types of media can be a bit of a pain to manage because they need to be rotated and replaced regularly to align with retention policies.
What’s the easiest way to enable immutability?
This is where Veeam B&R comes in – it’s an industry-standard backup solution that works with most storage media types, including physical and virtual tapes. What’s more, in Veeam B&R v11, they added support for Hardened Backup Repositories, allowing to enable immutability for backups without using object storage or any specialized third-party solutions. You can find the deployment documentation for this on Veeam B&R KB.
Now, you could go through the process of setting up a Linux server and configuring it to work with Veeam B&R, but it’s not exactly a walk in the park. However, there’s good news – we’ve made it super simple with StarWind VSAN. 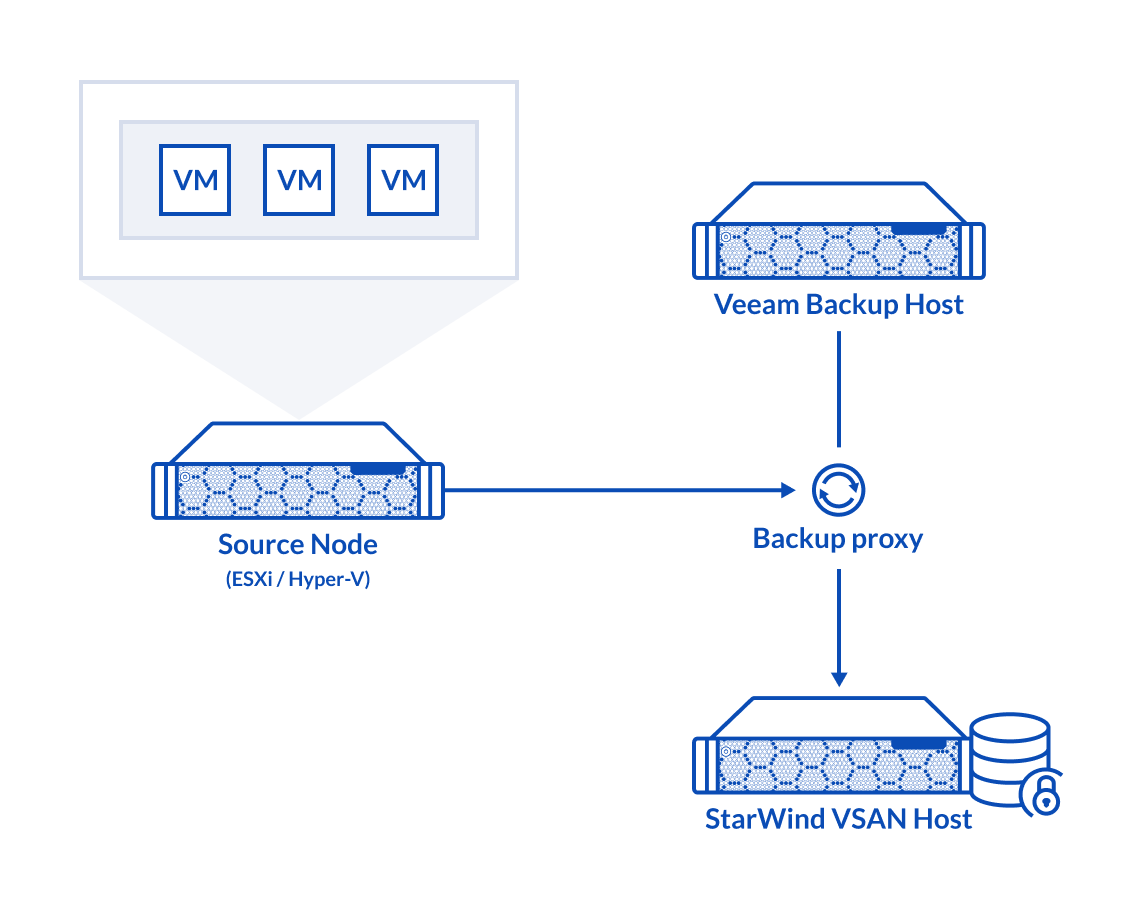
We’ve developed a set of management tools that are pre-configured in the web console, so you can easily set up a storage server using commodity hardware. All you need to do is use a few wizards in StarWind Virtual SAN web-console, and you’ll have a hardened repository for Veeam B&R in no time.
How to set up?
In today’s article, I won’t be covering the initial setup process. For details on configuring the StarWind Controller Virtual Machine (CVM), its networking, and storage, refer to our previous article: ‘How to Create a File Share with StarWind VSAN‘. Make sure to review it before proceeding. We’ll also post instructions for the bare-metal StarWind VSAN deployment in a separate blog post later on, so stay tuned.
Assuming you’ve completed the preliminary steps and created a storage pool, we can now move on to creating a new volume in the Virtual SAN Web UI.
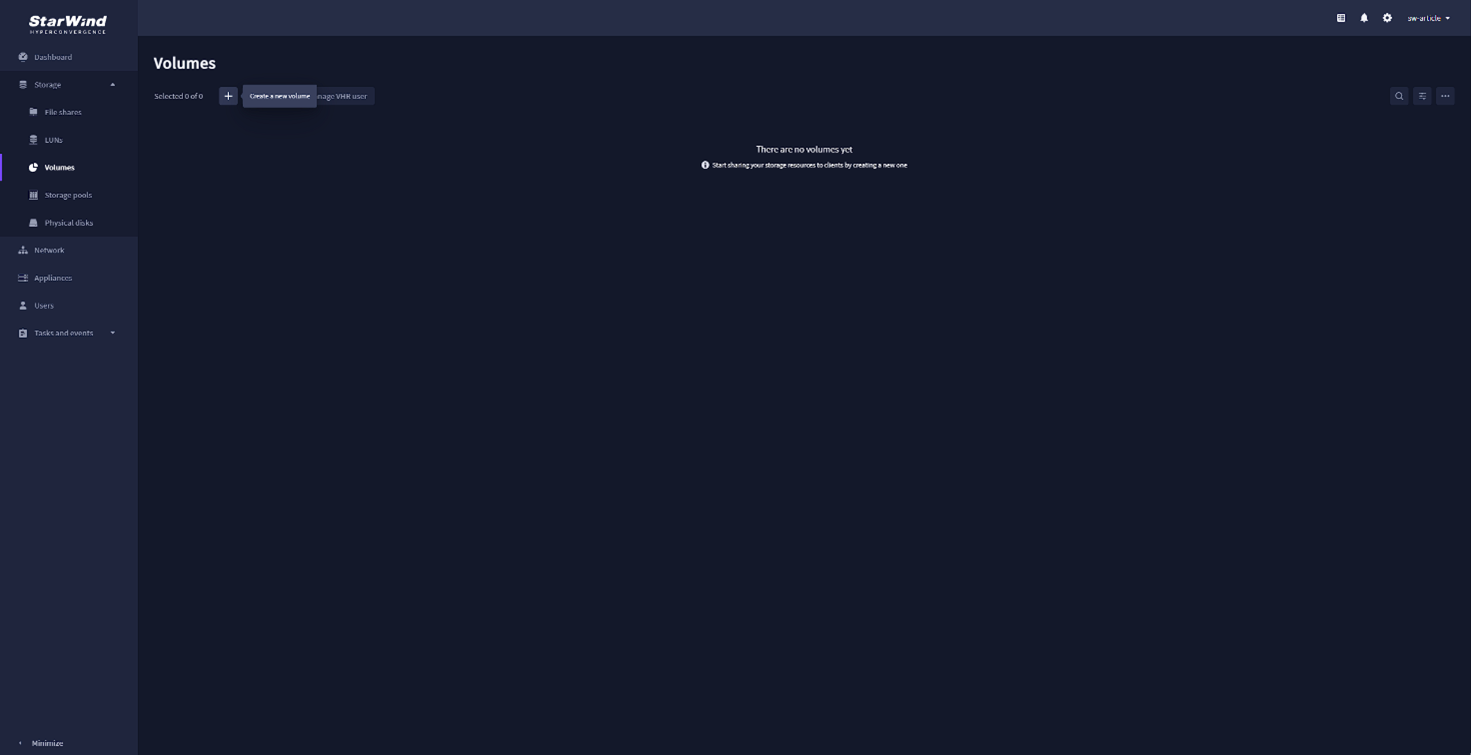
Once the storage pool is created, navigate to the “Volumes” tab and click the “+” button to open the “Create volume” wizard:
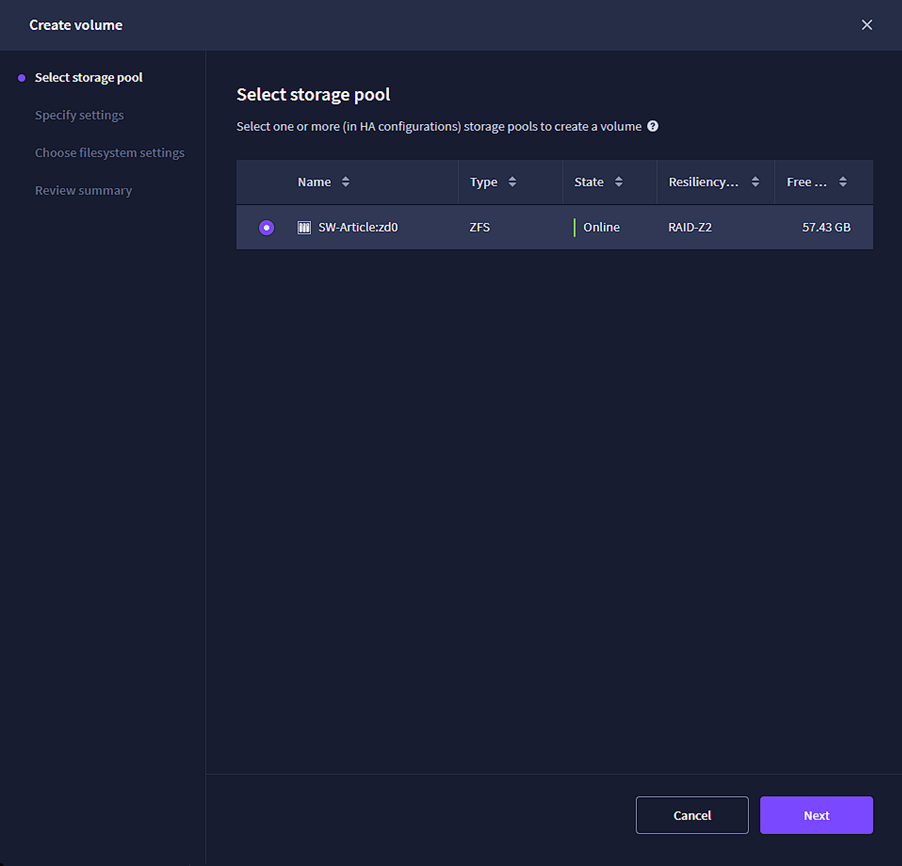
Now select the storage pool that you are going to use for the new volume and click “Next”:
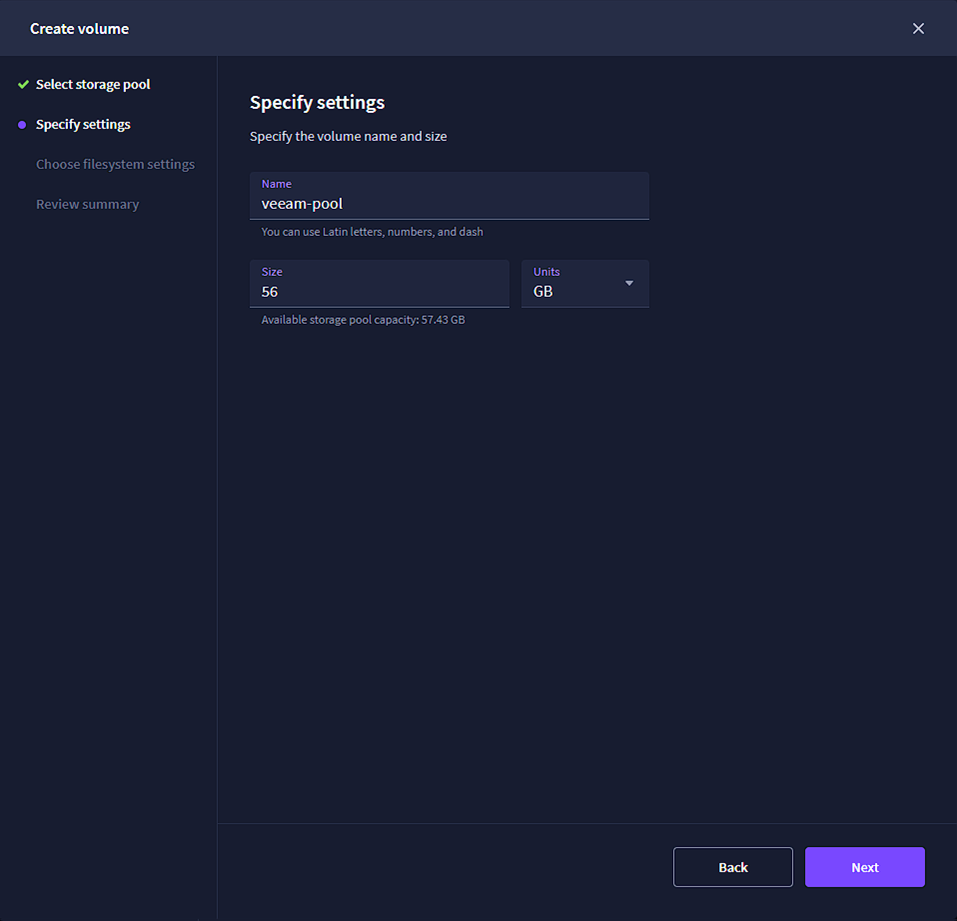
Specify the name of the new volume and select the required size:
Now select the filesystem for your volume. Select the “Backup repository” option, because it is already configured according to Veaam best practices and recommendations.
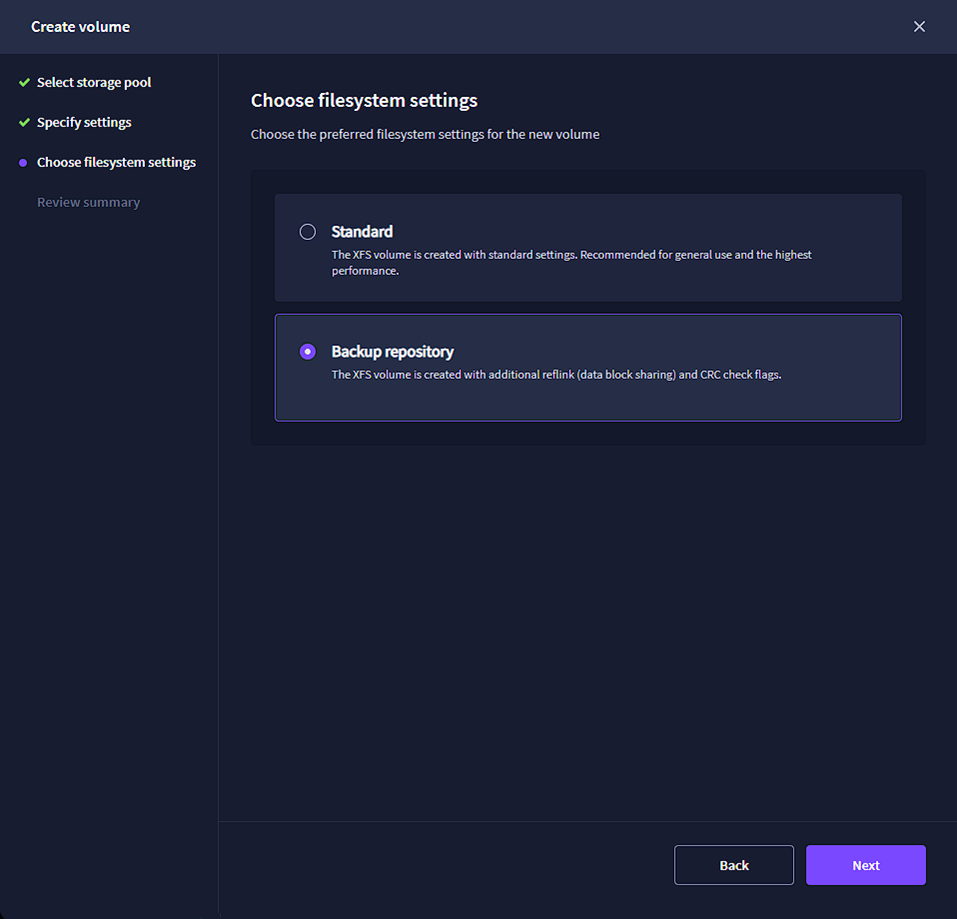
Review your settings and click “Create” to create the new volume:
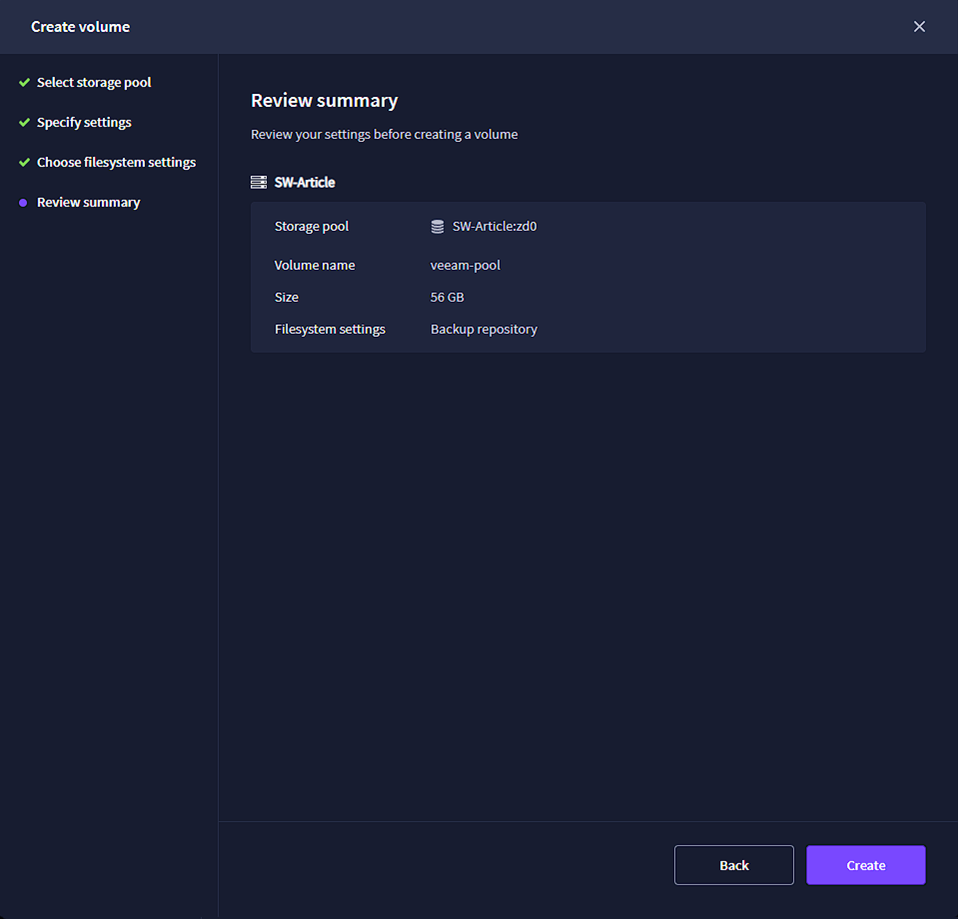
After this, you need to add a Veeam user to the CVM to provide Veeam access to the storage. For this, in the “Volumes” tab, select your newly created backup volume and click “Manage VHR (Veeam Hardened Repository) user.
In the “Manage VHR user” pop-up window, click the “+” button:
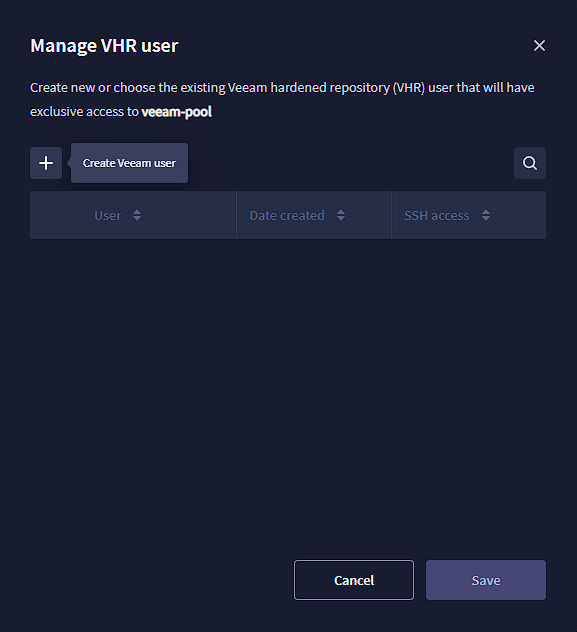
Specify the credentials for the new user:
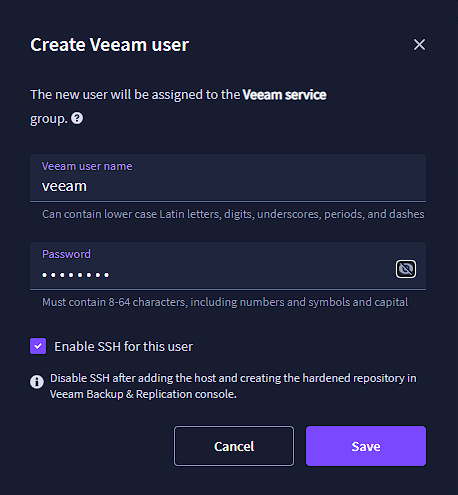
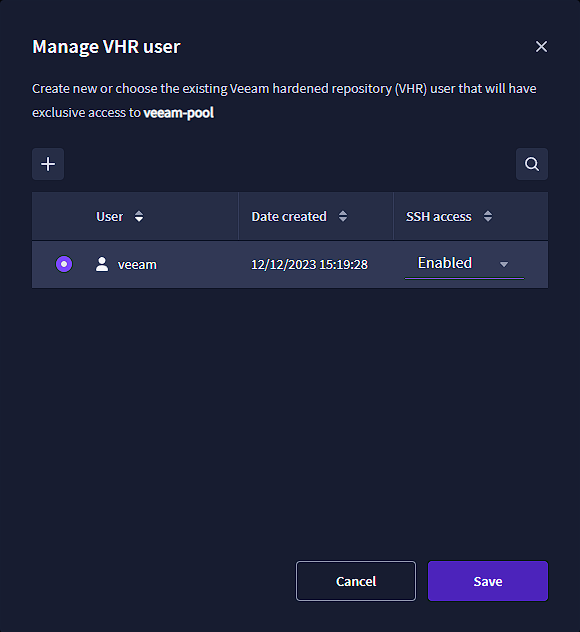
Select the newly created user and enable SSH access for it, and click “Save”:
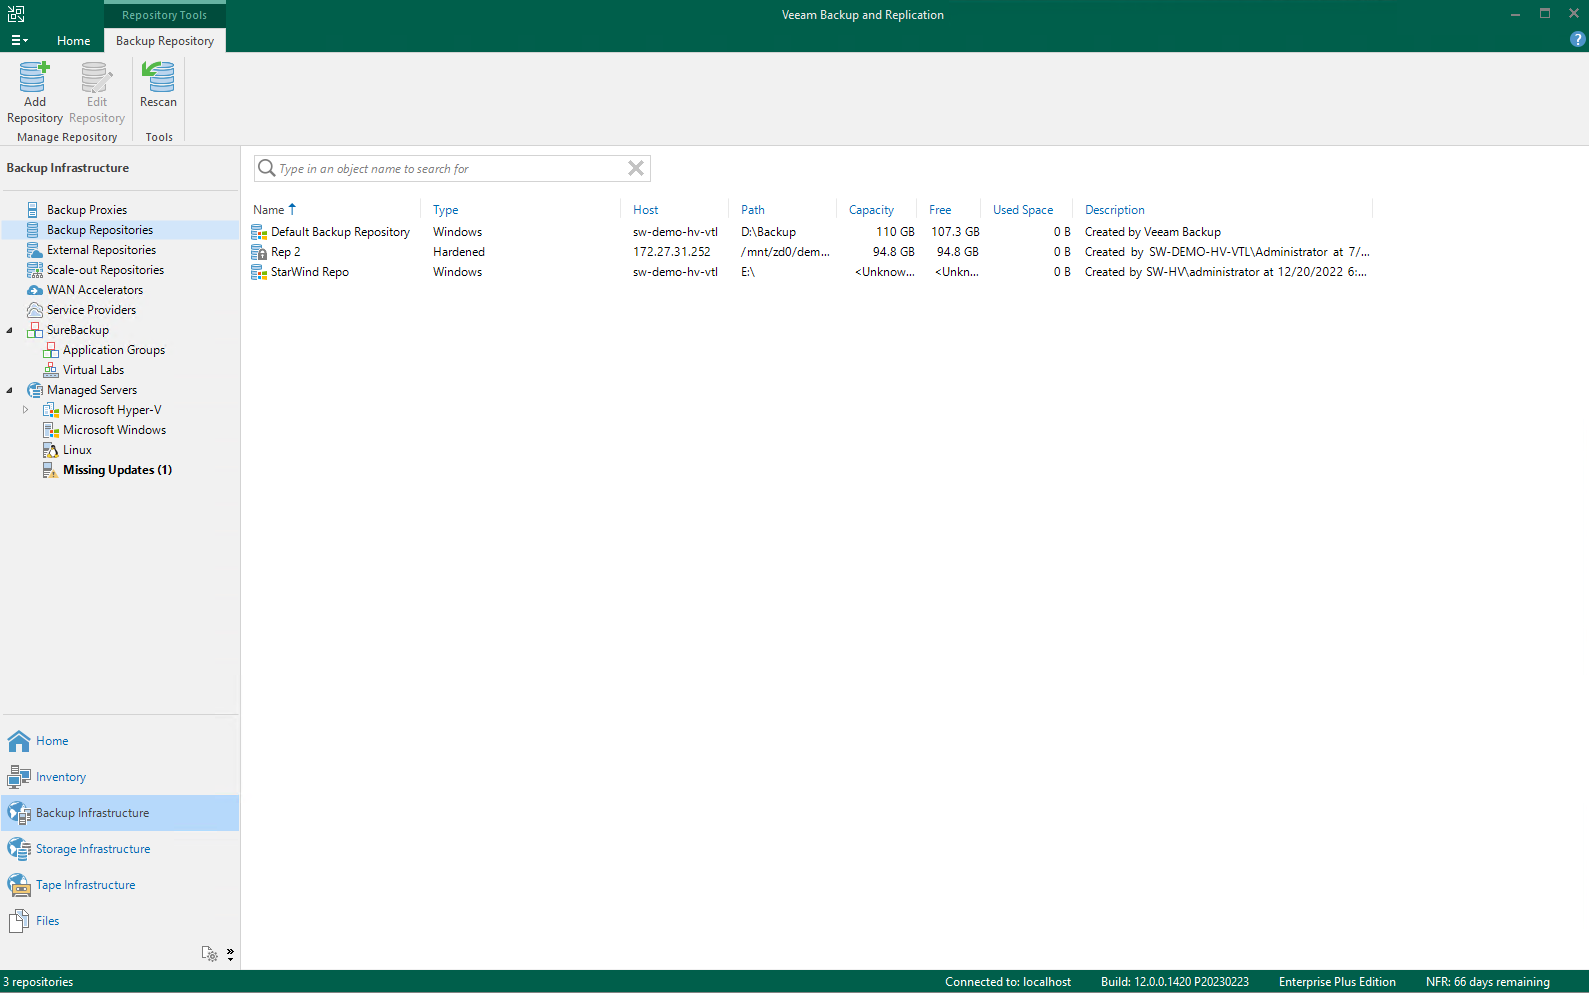
Congrats! You have completed the StarWind VSAN configuration. You’ll need to connect the created volume to Veeam B&R as the new backup repository. To do that, open the Veeam Backup and Replication console, navigate to “Backup Infrastructure”, and select “Backup Repositories”:
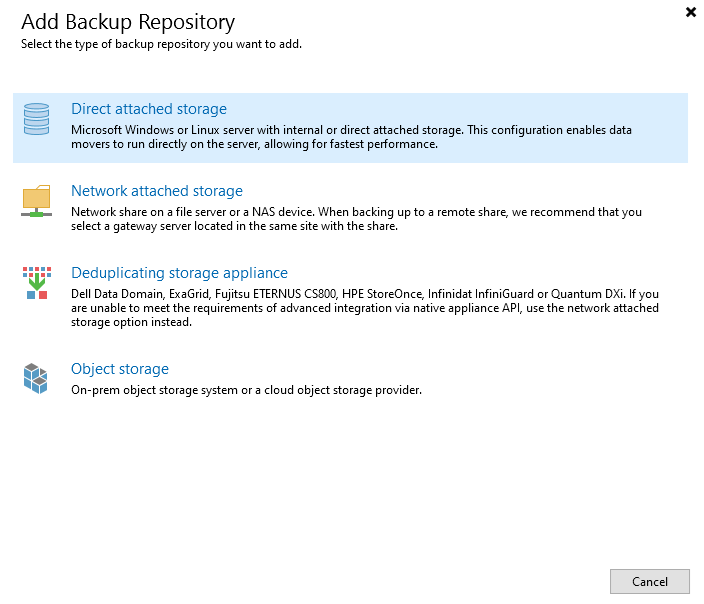
Click “Add Repository” and select “Direct attached storage:
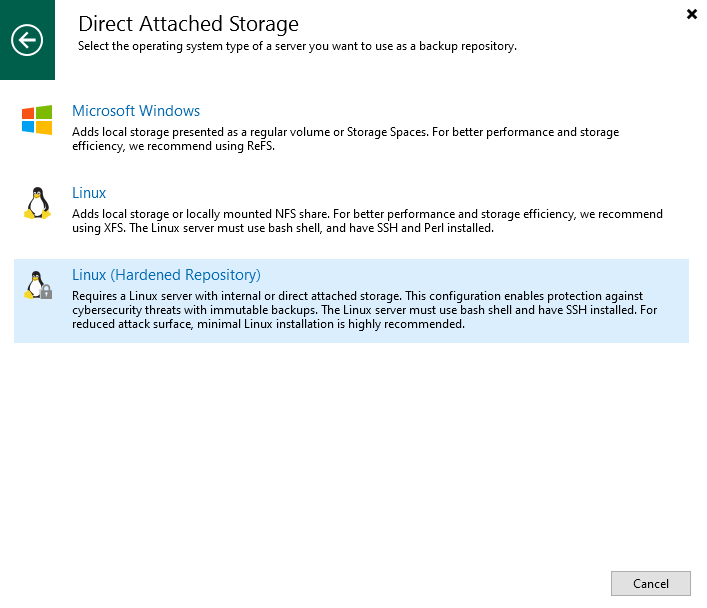
Next, select “Linux (Hardened Repository)”:
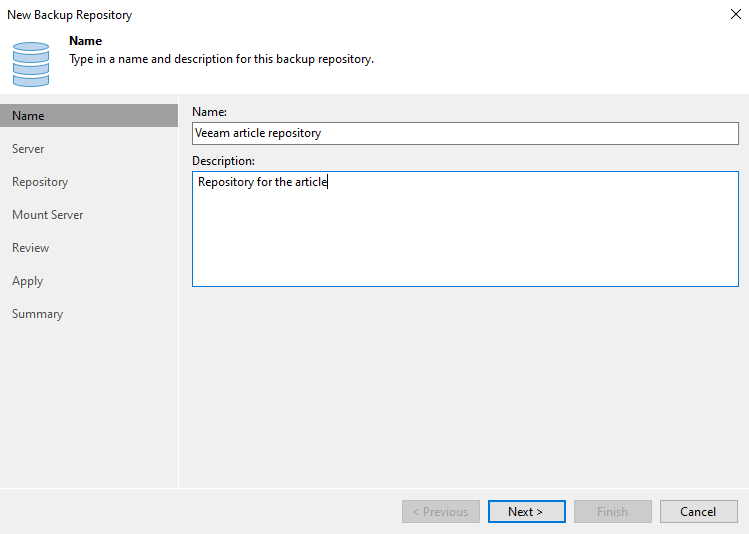
In the “New Backup Repository” wizard, specify the name and description for the new repository and click “Next”:
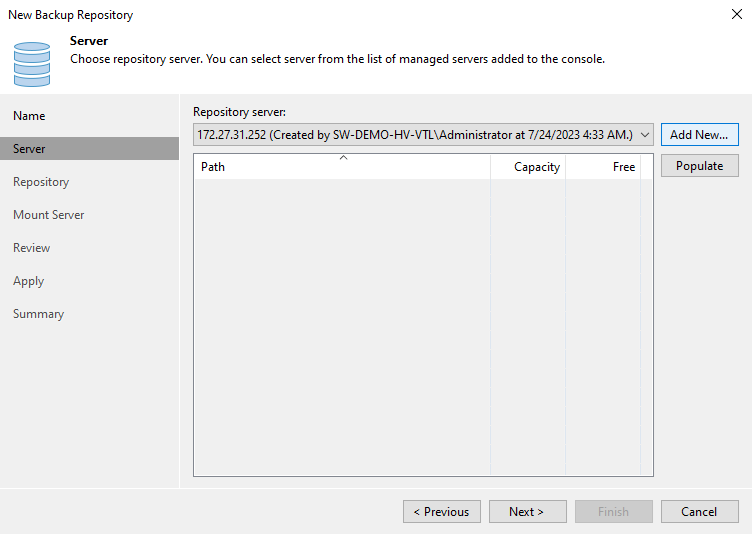
In the next step, click “Add New”:
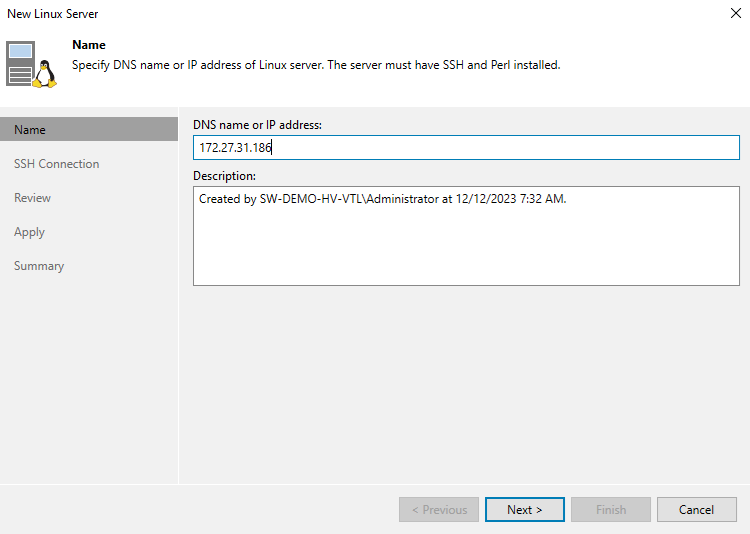
In the “New Linux Server” wizard, specify the IP address or the DNS name of your StarWind CVM and click “Next”:
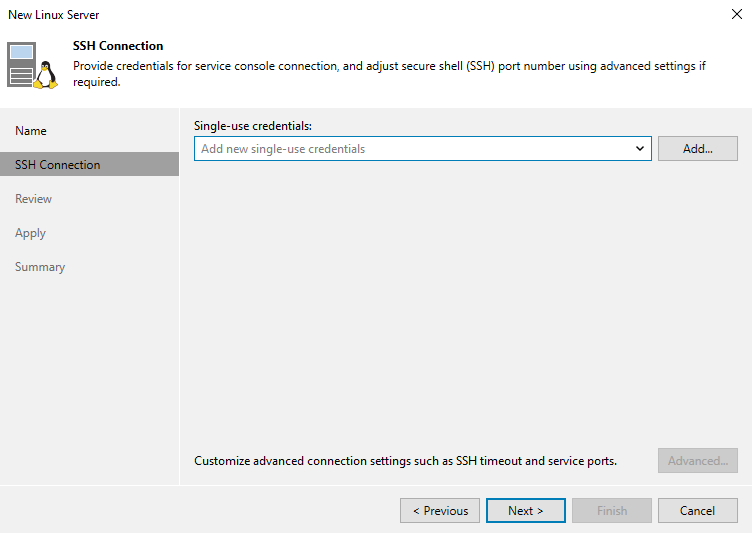
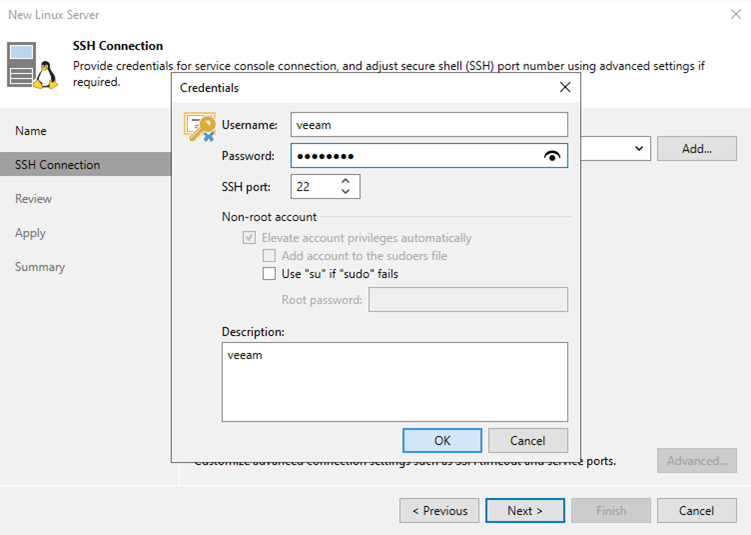
Click “Add” and specify the credentials of the VHR user account that you created in StarWind VSAN Web UI:
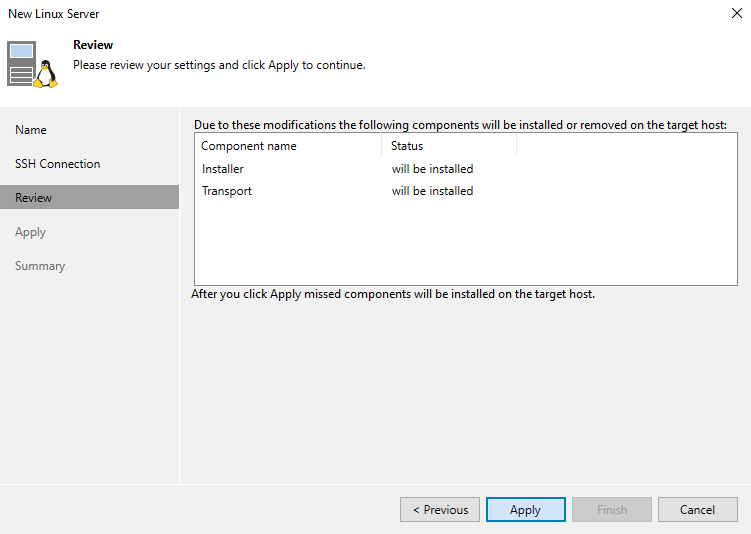
Review the installed components and click “Apply”:
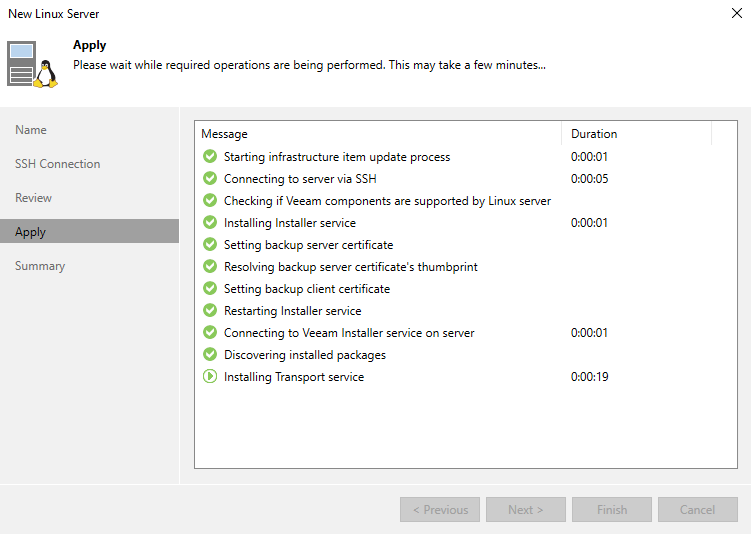
Wait until the installation is completed and then click the “Next” button:
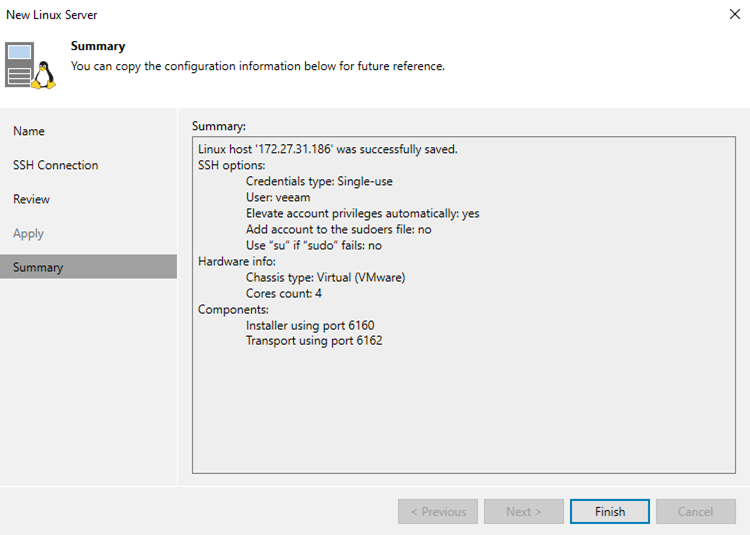
Review the summary and click “Finish”:
In the “New Backup Repository” wizard, select the newly added Repository server from the drop-down menu:
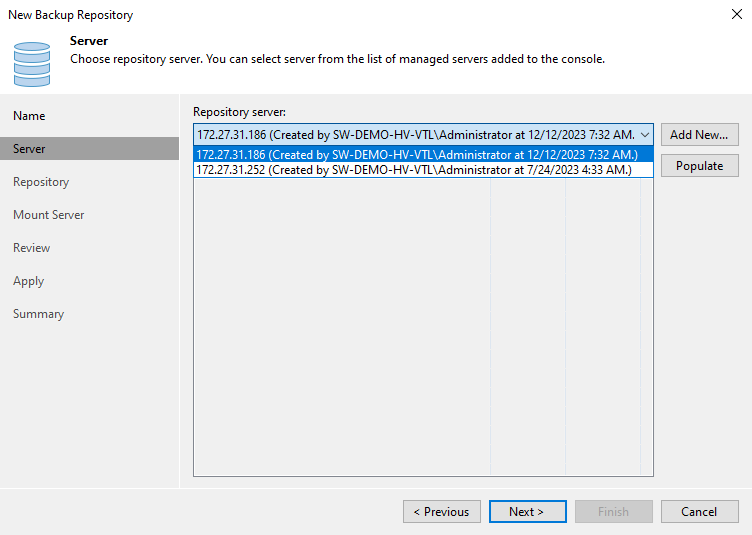
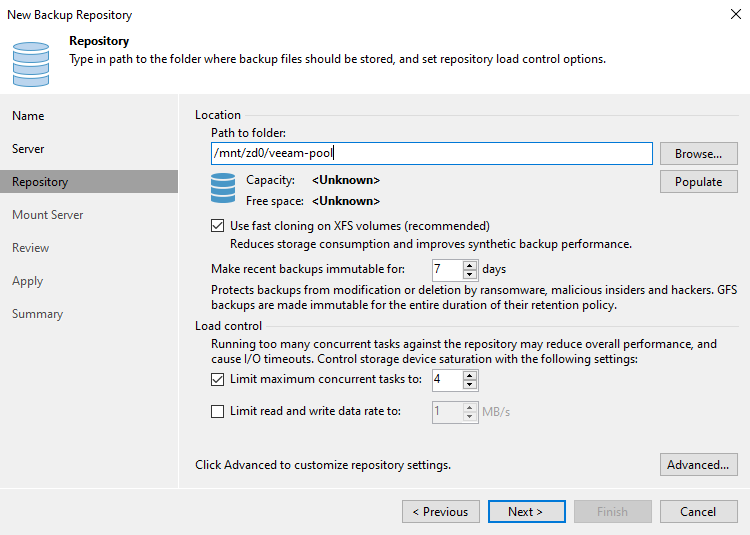
Now, select the path to the volume on the StarWind VSAN appliance. Also, check that the “Use fast cloning on XFS volumes” setting is enabled and specify the required retention period for immutability:
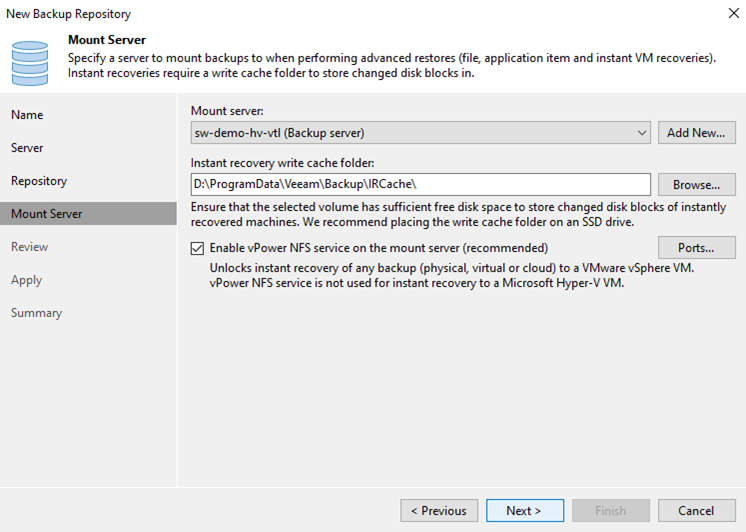
After that, check the Mount Server settings, where you will be doing fast restores of your backups:
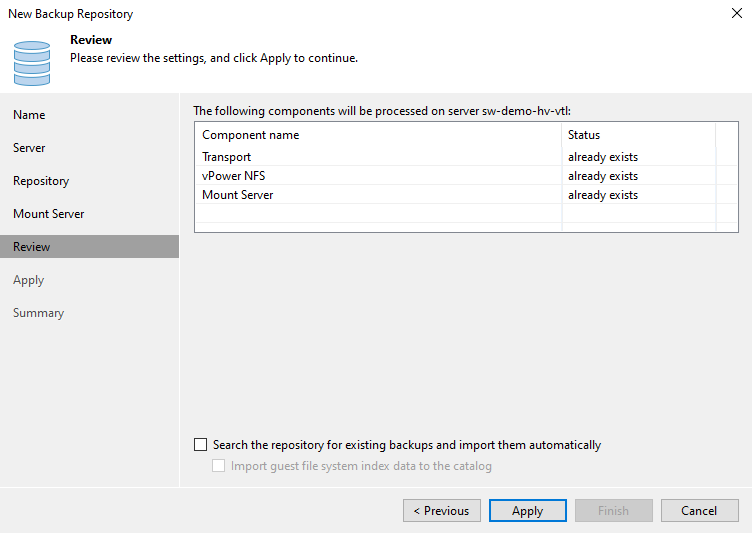
Check the components that will be installed and click “Apply”:
Wait until the process is completed and click “Next”:
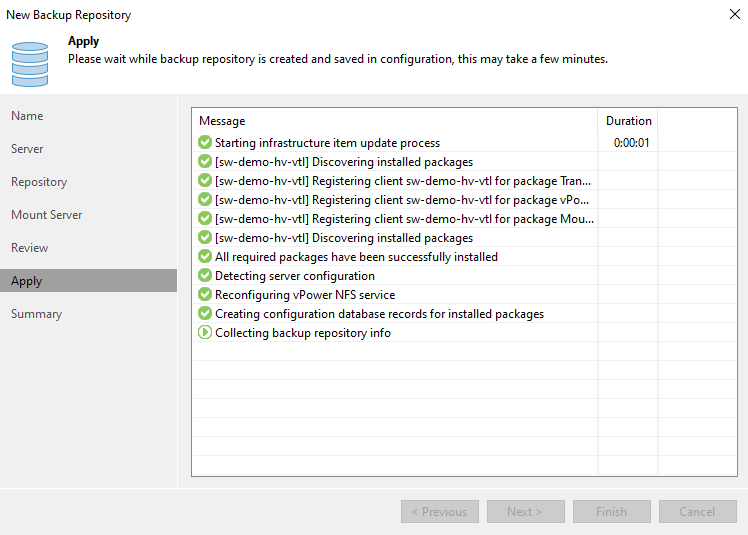
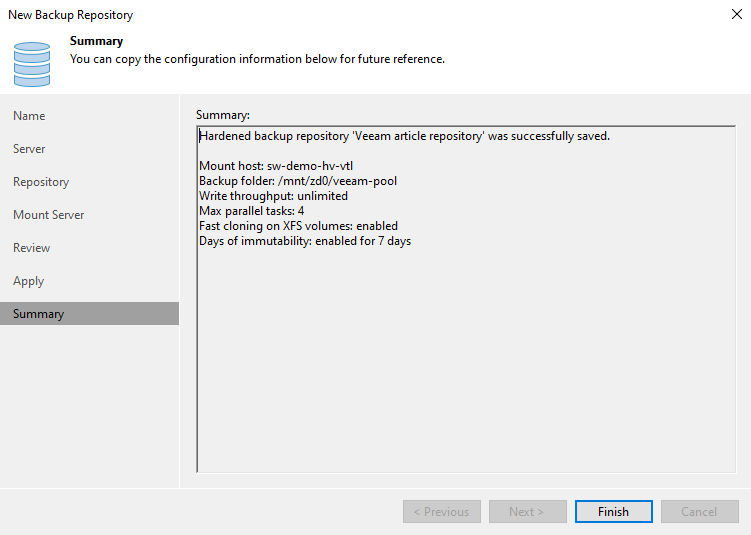
Review the summary and click “Finish”:
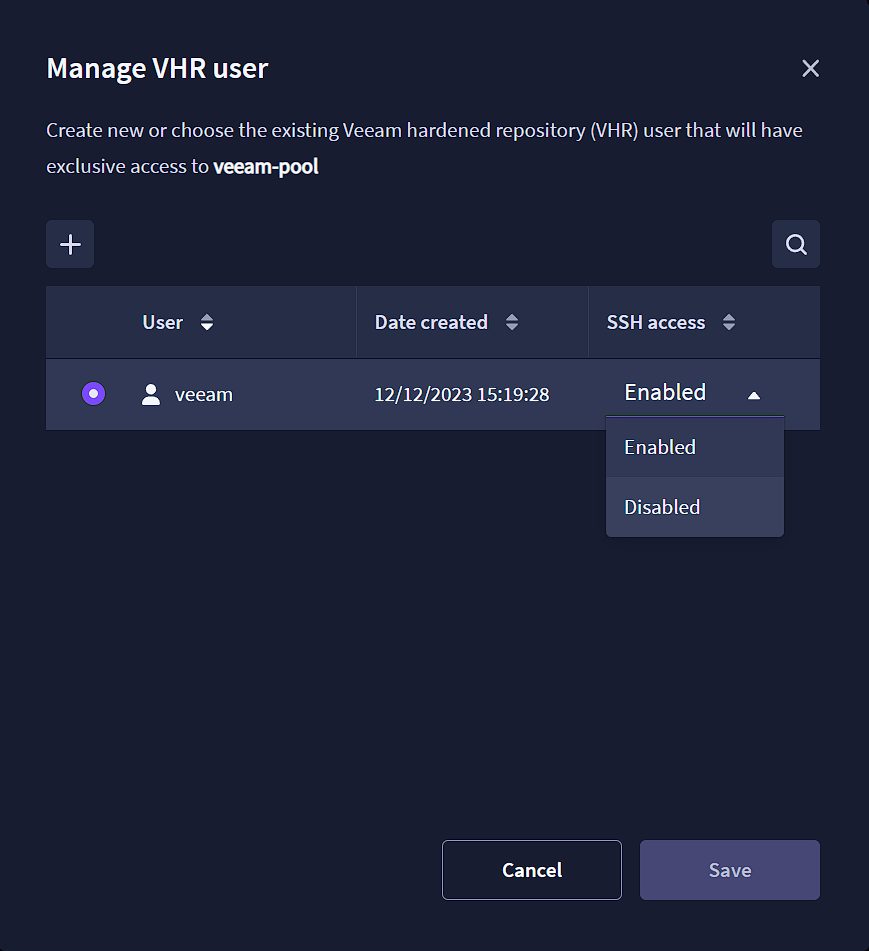
To secure the server from potential local threats such as credentials theft, in the StarWind VSAN Web UI, navigate to the “Volumes” page, launch the “Manage VHR user” wizard, and disable SSH for the VHR user account:
Additionally, keep in mind that this method makes it easy to set up a hardened repository and secure your backups. It’s still important to regularly test and verify your backups to ensure they are working properly and can be restored in case of an emergency. Ensure your software and hardware up to date, and to have a disaster recovery plan in place in case the worst happens.
Conclusion
To sum up, using StarWind VSAN as hardened repository for Veeam B&R is a great way to protect your business data from any threats, while also making the process of setting it up easy and straightforward. With the help of our management tools, you can have a secure and reliable backup solution up and running in no time. So, if you’re looking to upgrade your backup strategy and keep your data safe, give StarWind VSAN a try.
This material has been prepared in collaboration with Asah Syxtus Mbuo, Technical Writer at StarWind.
from StarWind Blog https://ift.tt/0zrfQO6
via IFTTT
No comments:
Post a Comment